What if the picturesque blanket of snow on your roof is actually the silent architect of an expensive interior renovation? It is a frustrating paradox that many homeowners face: your roof is leaking even though the temperature outside is well below freezing. You aren’t alone if you’ve spent cold mornings tossing salt pucks onto your eaves or nervously watching water spots spread across your ceiling drywall. These temporary fixes rarely address the root cause, and the fear of a sudden roof collapse or a massive repair bill can make every winter storm feel like a countdown to disaster.
We understand the unique challenges of maintaining a home in the Intermountain West, where heavy snow loads and fluctuating temperatures create the perfect conditions for ice dams. This guide provides the exact steps for preventing roof leaks from snow buildup by focusing on professional-grade protection and proper attic thermodynamics. You’ll learn how to identify early warning signs, understand the 2026 Utah building code requirements for ice shields, and discover why a custom-designed heat cable system is the most reliable way to secure your home. We’ll move past DIY myths to provide a methodical, long-term strategy that ensures your property remains safe and dry all season long.
Key Takeaways
- Understand the physics behind ice dams to realize why winter leaks are usually a drainage failure rather than a structural hole.
- Learn the essential steps for preventing roof leaks from snow buildup by identifying heat loss “light leaks” in your attic before the first storm.
- Discover why professional steam removal is the only safe way to clear active dams without risking permanent damage to your shingles.
- See how a custom-designed heat-trace layout provides targeted protection for valleys and eaves that generic DIY kits can’t match.
- Identify how “snow creep” and sun exposure on different roof slopes create unique mechanical pressures on your home’s structure.
Why is My Roof Leaking in Winter? Understanding the Ice Dam Effect
Identifying the source of a leak during a blizzard is often a stressful experience. Many homeowners assume a shingle has failed or a branch has punctured the roof deck. However, a winter leak is rarely the result of a physical hole. It is almost always a drainage failure caused by a specific temperature imbalance. When we talk about preventing roof leaks from snow buildup, we are really talking about managing how and where snow melts on your home.
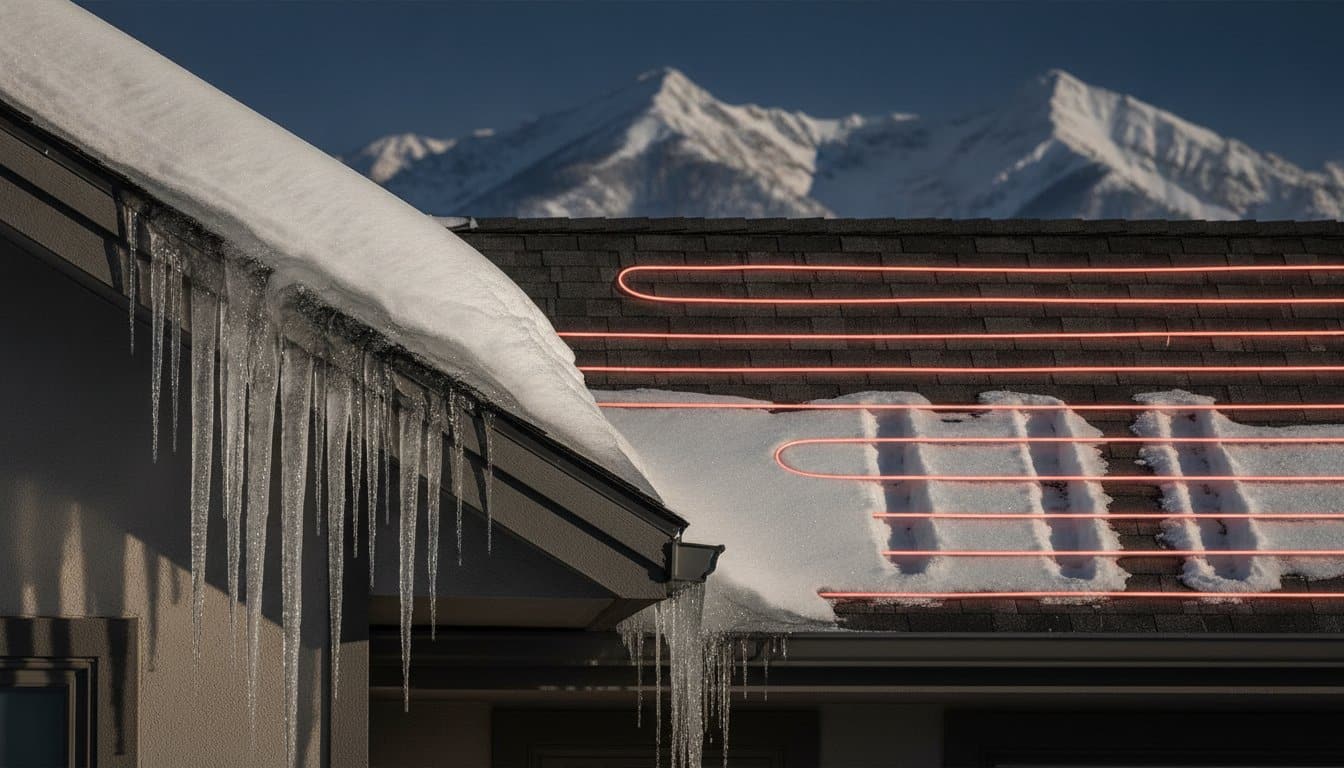
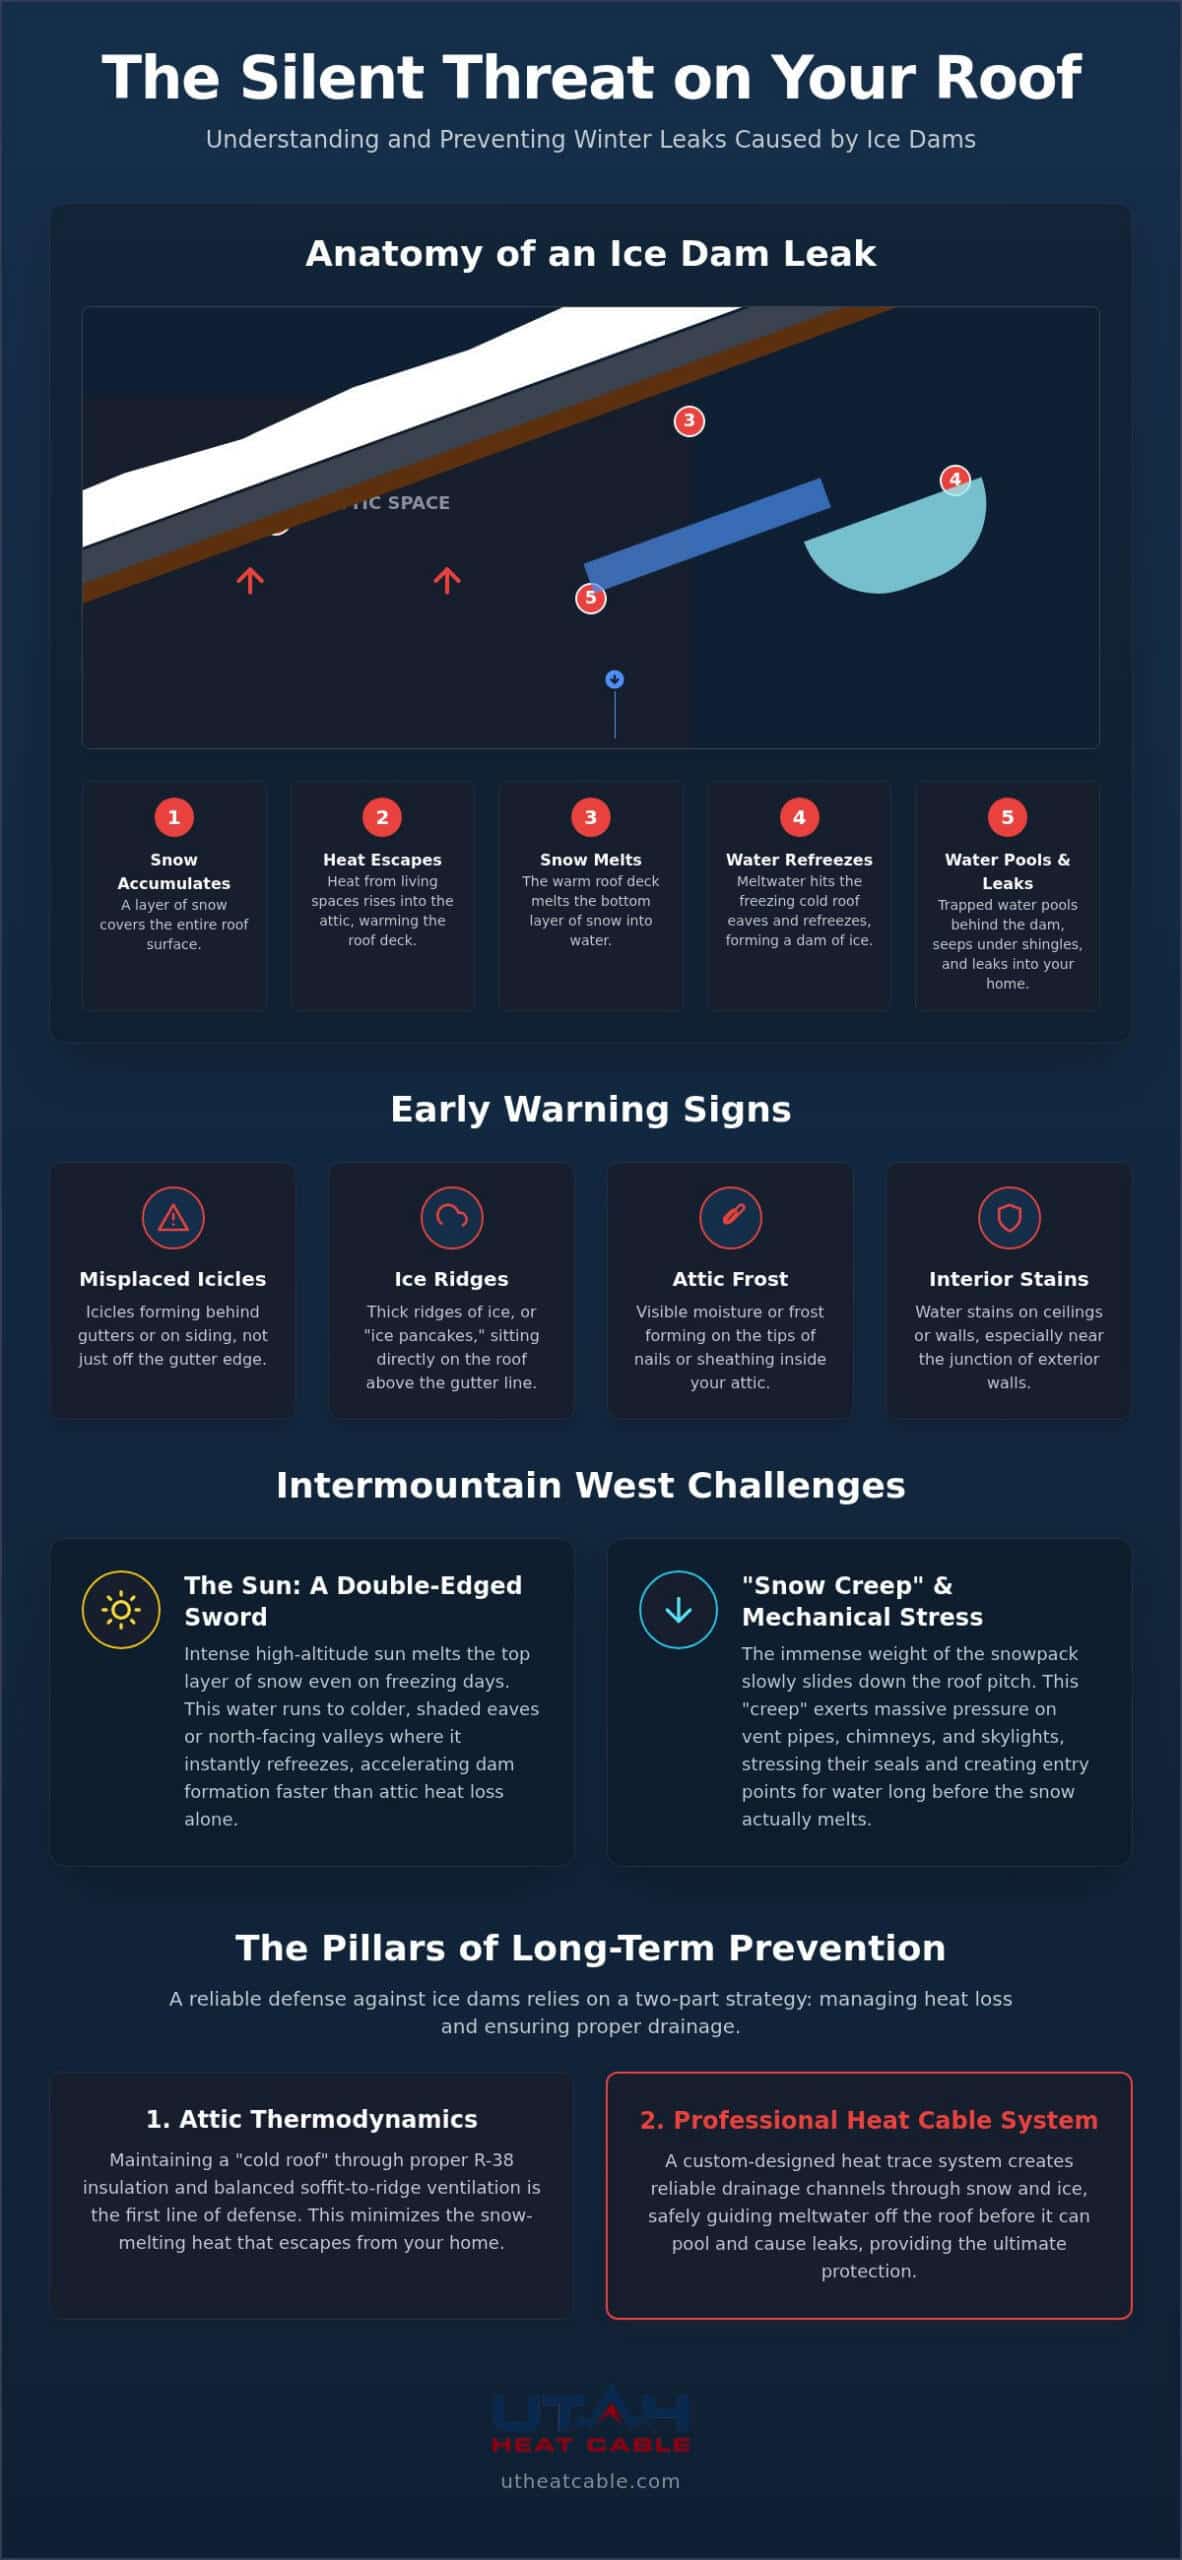
The process begins when heat from your living space escapes into the attic. This warm air heats the underside of the roof deck, causing the bottom layer of snow to melt. As this liquid water flows down toward the eaves, it hits a section of the roof that isn’t warmed by the attic. Because these eaves extend beyond the exterior walls, they remain at freezing temperatures. The water refreezes instantly, creating a solid barrier of ice.
This barrier creates a “pool effect.” As more snow melts, the water becomes trapped behind the ice ridge. Because asphalt shingles are designed to shed water moving downward, they have no defense against standing water. The liquid eventually finds its way under the shingles, traveling “uphill” through the laps and soaking into your roof sheathing and insulation. Watch for these red flags on your property:
- Icicles forming behind the gutters or along the siding rather than just off the front edge.
- Thick ridges of ice, often called “ice pancakes,” sitting directly above the gutter line.
- Moisture or frost appearing on the tips of nails in your attic.
- Water stains on interior drywall near the corners where the ceiling meets the exterior wall.
The Role of Attic Temperature and Ventilation
Even homes with modern insulation can struggle with this issue. Thermal bypasses, such as unsealed recessed lights, plumbing stacks, or chimney flues, allow concentrated bursts of heat to reach the roof. In the Intermountain West, our extreme temperature swings can overwhelm standard ventilation. When the roof deck stays warm while the outside air is freezing, the cycle of melting and refreezing becomes constant. Maintaining a “cold roof” requires a perfect balance of R-38 insulation and unobstructed airflow from the soffits to the ridge vents.
Anatomy of an Ice Dam Leak
To understand the mechanics, we first need to define What is an ice dam?. Technically, it is a ridge of ice at the edge of a roof that prevents melting snow from draining off. This creates a reservoir of water that sits directly over your home’s most vulnerable transition points. While many people blame their gutters, the gutter is usually just the foundation where the ice starts to stack. The actual failure happens on the roof deck itself, where the pooled water exerts hydrostatic pressure against the shingle seals until they give way.
The Lifecycle of Snow Buildup on Intermountain West Roofs
Living in high-altitude regions like Park City, Bear Lake, or the Teton Valley requires a specialized understanding of winter weather. It isn’t just about the total inches of snowfall recorded at the airport. The way snow interacts with your specific roof orientation and the intense high-elevation sun determines your actual risk level. While the previous section covered the physics of heat loss, the environmental lifecycle of snow on your shingles is often what dictates the severity of a leak.
In Utah and Idaho, the sun is a powerful tool for clearing south-facing slopes, but it can be a double-edged sword. While solar radiation melts the top layer of snow even on freezing days, that liquid water often runs down to shaded eaves or north-facing valleys where it refreezes instantly. This rapid cycle of daytime thaw and nighttime freeze accelerates dam formation much faster than heat loss alone. We also have to account for “snow creep.” This is the slow, gravitational slide of the entire snowpack down the roof pitch. Creep puts immense mechanical pressure on roof penetrations like vent pipes and chimneys. If these seals are stressed or pulled, water finds an entry point long before the snow actually clears.
Research from the University of Minnesota Extension confirms that heat loss is a major culprit, but in the Rockies, we must also manage the sheer weight of high-altitude snow loads. Preventing roof leaks from snow buildup in these conditions requires a strategy that accounts for both the weight of the pack and the movement of the meltwater.
North-Facing Slopes and Persistent Ice
North slopes are the most common sites for drainage failure in our region. Because they receive almost no direct sunlight during the mid-winter months, snow piles up and remains frozen for weeks. Without solar assistance to clear the eaves naturally, an ice dam can grow several inches thick in a single storm cycle. Managing these “cold” sides of a building often requires active intervention because insulation alone cannot stop the snow from accumulating and eventually melting from the bottom up due to residual building heat.
Complex Roof Geometry and Snow Traps
Architectural features like dormers, deep valleys, and areas where a lower roof section meets a high exterior wall create “dead zones.” These are spots where wind-blown snow accumulates in massive drifts, often three or four times deeper than the rest of the roof. Standard roofing underlayment is designed to shed water, but it often fails under the sustained hydrostatic pressure found in these snow traps. If your home features these complex lines, it is often wise to consider a customized snow melt design to protect those specific vulnerabilities before the next heavy cycle begins.
Immediate Action vs. Long-Term Prevention
Panic is a poor advisor during a winter storm. If you discover water ingress, your first instinct might be to grab a ladder and a hammer, but mechanical force is the enemy of a frozen roof. When you are focused on preventing roof leaks from snow buildup, it’s vital to distinguish between a temporary fix and a permanent solution. Striking an ice dam with a mallet or axe often shatters the shingles beneath the ice, which are already brittle from the cold. This turns a seasonal drainage issue into a permanent structural hole. The “Ice Dam Steam” rule is absolute: professional de-icing services using low-pressure steam are the only safe way to clear an active blockage without voiding your roof warranty.
While snow raking can offer some immediate relief by removing the fuel for the melt-refreeze cycle, it is merely a band-aid. It is labor-intensive, dangerous, and often results in damaged gutters. The cost of inaction or improper “quick fixes” is high. Water that stays trapped behind an ice dam eventually saturates the roof deck, leading to structural rot and mold growth within your wall cavities. These issues can quietly decrease your property value and lead to health concerns long after the snow has melted. True protection requires moving from emergency response to a engineered drainage strategy. For homeowners along the Wasatch Front, professional roof de-icing services in Centerville UT provide the code-compliant, permanent solution that eliminates this cycle of recurring damage.
Professional Self-Regulating Cable vs. DIY Heat Tape
The “heat tape” found in big-box stores is often a constant wattage product with a short lifespan, typically failing after just one or two seasons. In contrast, a professional Self Regulating Heat Cable is built to last 10 to 20 years. These advanced systems are far more energy-efficient because they adjust their heat output based on the ambient temperature. If the air is colder, the cable draws more power; as it warms up, the cable throttles back automatically. Because these systems involve high-wattage circuits on a wet roof, a licensed electrical contractor must handle the installation to ensure code compliance and fire safety.
When Insulation Isn’t Enough
There is a common misconception that enough insulation will solve every leak. However, many homes in the Intermountain West have “un-insulatable” features like vaulted ceilings, dormers, or flat commercial roofs where there is no attic space to seal. Even in modern homes, complex HVAC ductwork running through the attic can create unavoidable heat signatures on the roof deck. In these scenarios, professional heat trace acts as an essential “Plan B.” It ensures that even if an ice dam begins to form, a clear drainage path remains open for meltwater to exit the roof safely. This is why professional-grade technology is the standard for preventing roof leaks from snow buildup in high-altitude environments.
Step-by-Step: How to Winterize Your Roof for Maximum Protection
Effective winterization is a chronological process that starts long before the first snowflake touches your shingles. If you wait until the ground is frozen to address your roof’s vulnerabilities, you’ve already lost the most critical window for preventing roof leaks from snow buildup. Preparation should follow the rhythm of the seasons, moving from external cleaning to internal inspections and finally to active management once the storms arrive. This methodical approach ensures that your home is prepared for the sustained pressure of high-altitude winters.
Early fall is the time for a thorough drainage audit. Gutters filled with leaves and pine needles don’t just block water; they provide a physical anchor for ice to grip. Once an ice dam attaches to debris, it becomes much harder to clear. This is also the vital time for testing any existing heat-trace systems. You should plug in your controllers and check the cable temperature while it’s still safe to climb a ladder. If a cable feels cold or shows signs of fraying, it’s better to discover the failure in October than during a January blizzard.
As the outside air cools in mid-fall, perform a “light leak” test in your attic. On a bright day, turn off all attic lights and look for sunbeams piercing through the insulation or around fixtures. These are often thermal bypasses where heat will escape in the winter, causing the localized melting that starts the damming process. Sealing these gaps now will significantly reduce the thermal load on your roof deck and help maintain that essential “cold roof” environment.
Gutter and Downspout Preparation
Clear downspouts are the most critical link in the drainage chain. Even if your roof is clear, a frozen downspout will cause water to back up into the gutters and eventually onto the roof deck. Removing organic matter prevents the “damming effect” within the gutter itself. If you have a professional system, ensure the Self Regulating Heat Cable extends all the way through the downspout and out the exit to maintain a continuous path for meltwater. This prevents the “ice plug” that often forms at the base of the house.
Managing Snow Slides on Metal Roofs
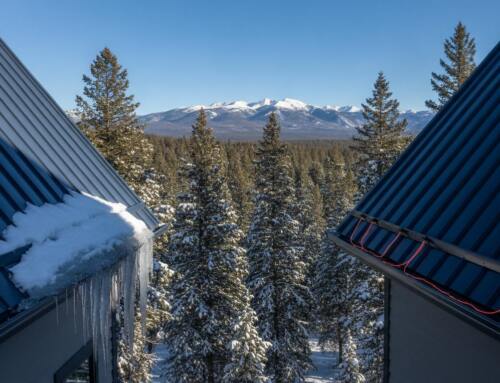
Metal roofs present a unique challenge in the Intermountain West. Their smooth surface allows snow to shed quickly, which can lead to dangerous “roof avalanches.” These slides can rip gutters off the eaves or bury entryways in seconds. Installing Roof Snow Retention systems, or snow guards, is essential for holding the snowpack in place so it can melt gradually. Integrating these guards with a gutter heat-trace system creates a total defense. The guards hold the weight, while the cables ensure the resulting meltwater has a clear exit. If you’re concerned about your roof’s ability to handle the coming season, you can schedule a professional system inspection to ensure every component is ready for the heavy snow.
Designing a Custom Defense with Utah Heat Cable
While previous steps like attic sealing and gutter clearing form a strong foundation, many Intermountain West homes require an active, engineered defense. Preventing roof leaks from snow buildup on a complex roofline often demands more than just standard maintenance. This is where the perspective of a licensed electrical contractor becomes invaluable. We understand the underlying electrical load requirements and the specific mechanics of heat transfer on a frozen roof deck. A professional design moves beyond guesswork, offering a precision-mapped system that targets your home’s specific vulnerabilities.
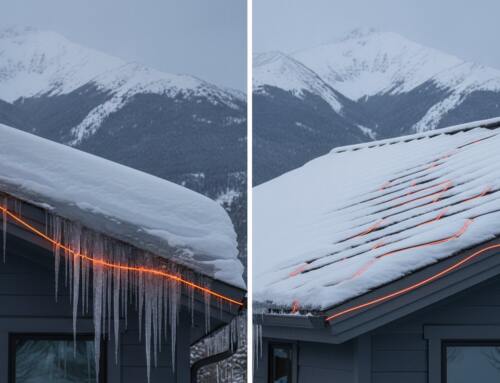
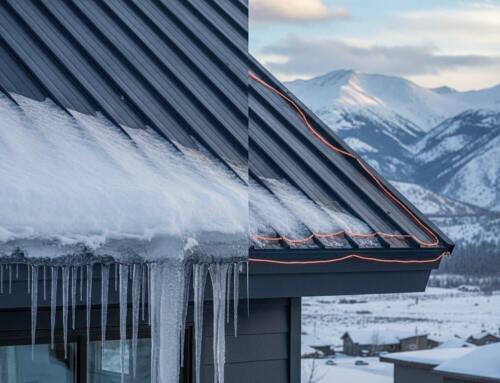
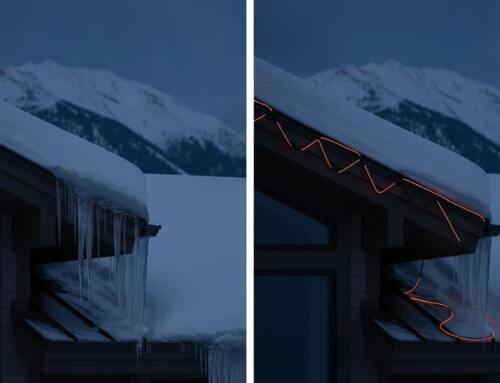
We don’t believe in off-the-shelf kits because every roof is a unique environment. A custom heat-trace layout might involve a traditional zig-zag pattern along the eaves to prevent ice dams, or it might focus exclusively on high-risk valleys where snow traps occur. We also integrate Controller Options that use moisture and temperature sensors to automate the system. These sensors “think” for you, activating the cables only when both freezing temperatures and moisture are present. This automation provides the highest level of efficiency, ensuring you aren’t paying for power when the roof is dry or the sun is doing the work for you.
Professional design offers a level of peace of mind that DIY solutions cannot match. When a system is engineered for the specific pitch, orientation, and snow load of your property, it functions as a reliable safety net. This methodical approach ensures that even during the most severe winter cycles, your drainage paths remain open and your interior remains dry.
Our Process: From Design to Code-Compliant Installation
Our process begins with a technical assessment of your local climate zone. For instance, a home in a high-altitude area with heavy snow loads requires a different wattage calculation than a property in a lower valley. We ensure every Self Regulating Heat Cable installation includes dedicated circuits and GFCI protection to meet strict Utah and Idaho electrical codes. This focus on code compliance isn’t just about passing inspections; it’s about the long-term safety and durability of your home’s electrical infrastructure.
Beyond the Roof: Sidewalk and Driveway Snow Melt
Property protection doesn’t have to stop at the eave line. Many homeowners find that Sidewalk and Driveway Deicing Systems are the final piece of the winterization puzzle. These integrated systems protect your home’s foundation by directing meltwater away from the structure while keeping your walkways clear of ice. By combining roof protection with ground-level snow melt, you create a comprehensive shield against the elements. If you are ready to move from temporary fixes to a permanent, professional-grade solution, you can schedule a professional consultation with Utah Heat Cable to secure your home before the next season begins.
Secure Your Home Against the Coming Winter
Managing a home in high-altitude environments requires moving from reactive emergency repairs to a proactive, engineered strategy. By understanding how temperature imbalances create ice dams and maintaining your drainage systems in the fall, you take the first steps toward preventing roof leaks from snow buildup. While insulation and ventilation are critical, many properties in our region feature complex geometries that demand an active solution to ensure meltwater has a safe exit path throughout the season.
Utah Heat Cable is a licensed electrical contractor providing custom engineered solutions designed specifically for the heavy snow loads found in Utah, Idaho, and Wyoming. Our professional-grade systems offer a level of durability and efficiency that off-the-shelf kits simply cannot match. Don’t wait for the first ceiling stain to appear before securing your property. You can Get a Professional Heat Trace Design for Your Utah Home today. Taking these steps now ensures your family stays safe and dry all winter long.
Frequently Asked Questions
Why is my roof leaking only when there is snow on it?
Your roof is leaking because of ice dams that trap liquid water behind a solid ridge of ice at the eaves. This occurs when heat from your attic melts the bottom layer of snow, which then flows down and refreezes over the unheated overhangs. Because asphalt shingles are designed to shed water moving downward, the pooled water eventually finds its way under the shingles and into your home.
Will cleaning my gutters prevent ice dams and roof leaks?
Cleaning your gutters is a vital first step for drainage, but it won’t stop an ice dam from forming on the roof deck itself. While clear gutters allow meltwater to exit the property, the actual blockage usually starts on the shingles just above the gutter line. A comprehensive strategy for preventing roof leaks from snow buildup requires addressing attic heat loss and installing professional grade heat cables.
Are heat cables safe to leave on all winter?
Modern self-regulating heat cables are designed to remain powered throughout the winter season. These systems are technically advanced; they automatically adjust their heat output based on the outside temperature to maintain a clear drainage path. This makes them much safer and more energy efficient than older constant wattage models. Using a professional controller further ensures the system only draws power when it is actually needed.
How much snow is too much for my roof to handle?
Most residential roofs can handle about 20 to 40 pounds per square foot, but specific 2026 Utah building code amendments require even higher durability in certain regions. For areas where ground snow loads exceed 75 pounds per square foot, eaves must be able to sustain significantly higher distributed loads. If you see more than two feet of heavy, wet snow accumulating, it is time to consider professional removal.
Can I install heat tape myself, or do I need a pro?
You should hire a professional for any heat cable installation to ensure the system is code compliant and safe. A licensed electrical contractor understands the specific wattage requirements for our local climate and can install dedicated circuits that prevent tripped breakers. Professional installation is a key component in preventing roof leaks from snow buildup because it eliminates the fire risks associated with low quality DIY heat tape.
Does homeowners insurance cover damage from ice dams?
Standard homeowners insurance typically covers the resulting interior damage, such as ruined drywall or flooring, but it rarely covers the cost of the ice dam removal itself. Most policies view the formation of ice dams as a maintenance issue rather than a sudden accident. It is always more cost effective to invest in a permanent prevention system than to pay for emergency services and insurance deductibles after a leak occurs.
What is the difference between a snow guard and a heat cable?
A snow guard provides mechanical roof snow retention to prevent dangerous avalanches, while a heat cable creates a melted channel for water drainage. Snow guards are essential for smooth surfaces like metal roofs to keep the snowpack in place. Heat cables complement this by ensuring that as the retained snow slowly melts, the water has a clear, unfrozen path to the ground without backing up under your shingles.
How do I know if my attic has enough insulation?
The simplest way to check your insulation is to look at the floor joists in your attic. If you can see the wooden beams, you likely don’t have enough insulation to prevent the heat loss that causes ice dams. For the Intermountain West climate, the recommended standard is R-38 insulation, which usually equates to a depth of about 12 to 15 inches of consistent coverage across the entire attic floor.