
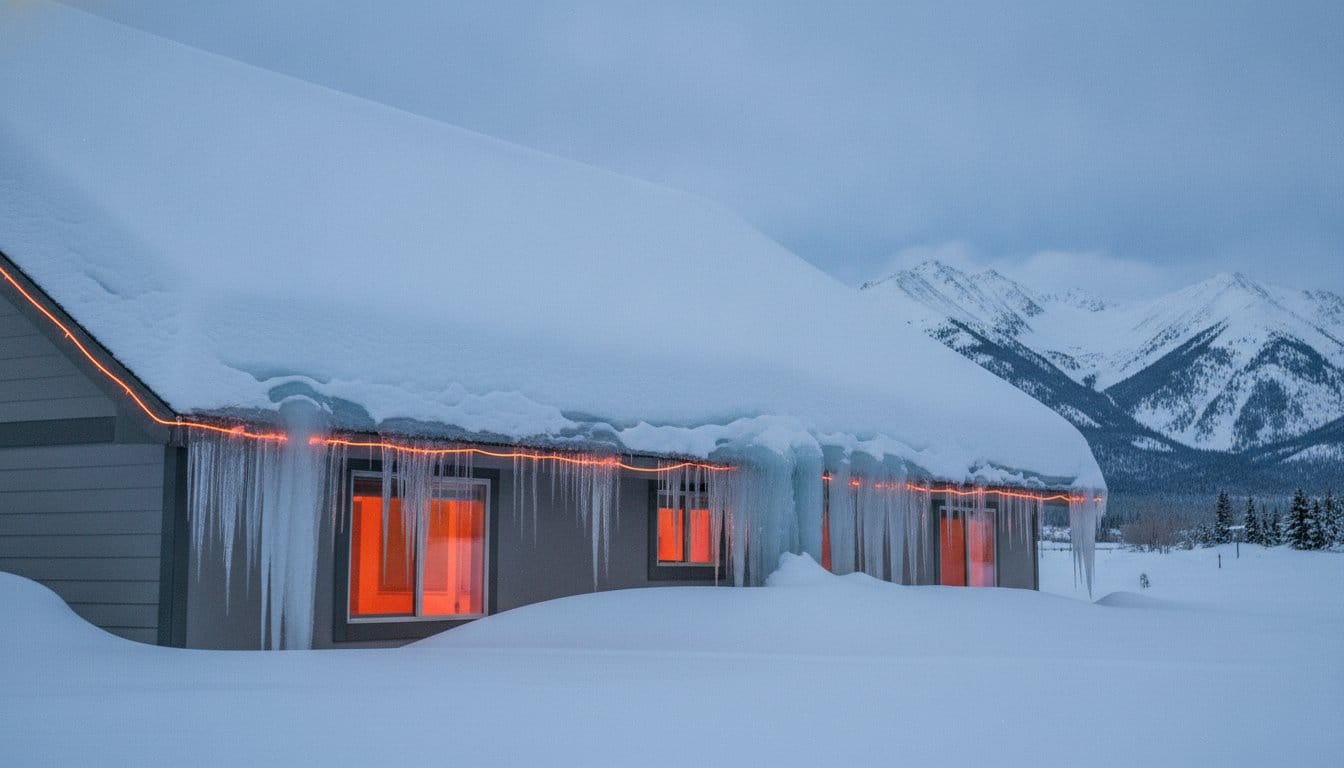
Your north-facing roof is “solar-deficient,” which means it lacks the natural thermal energy required to clear snow before it transforms into a structural hazard. While the south side of your home might bake in the afternoon sun, the shaded north slope stays frozen, creating a perfect environment for thick, stubborn ice ridges. You’ve likely tried adding more insulation or attic venting, yet you still face recurring leaks and dangerous icicles every winter. It’s a common frustration for homeowners who realize that standard passive solutions often fail when the sun isn’t there to help.
Understanding how to stop ice dams on north facing roof sections requires a shift from passive insulation to active protection. In this 2026 guide, you’ll learn the specific building science behind shaded slopes and why they demand a different strategy than the rest of your property. We’ll explore how professional-grade, self-regulating heat cable systems can replace the sun’s missing warmth to keep your gutters clear and your entryways safe. By the end of this walkthrough, you’ll have a clear roadmap to a dry home and a permanent solution that finally lets you put the roof rake away for good.
Key Takeaways
- Understand why north-facing slopes are solar-deficient and why they require a specialized approach compared to sun-exposed sections of your home.
- Identify common internal air leaks in north-side rooms that contribute to roof deck warming and subsequent ice formation.
- Discover how to stop ice dams on north facing roof areas using self-regulating heat cable as a reliable substitute for natural solar melting.
- Learn how to protect your gutters from heavy, dense snow loads using integrated snow retention systems and professional-grade layouts.
- Recognize the safety and performance benefits of code-compliant, professional installation over high-risk DIY heat tape options.
The Physics of North-Facing Roofs: Why Ice Dams Target the Shade
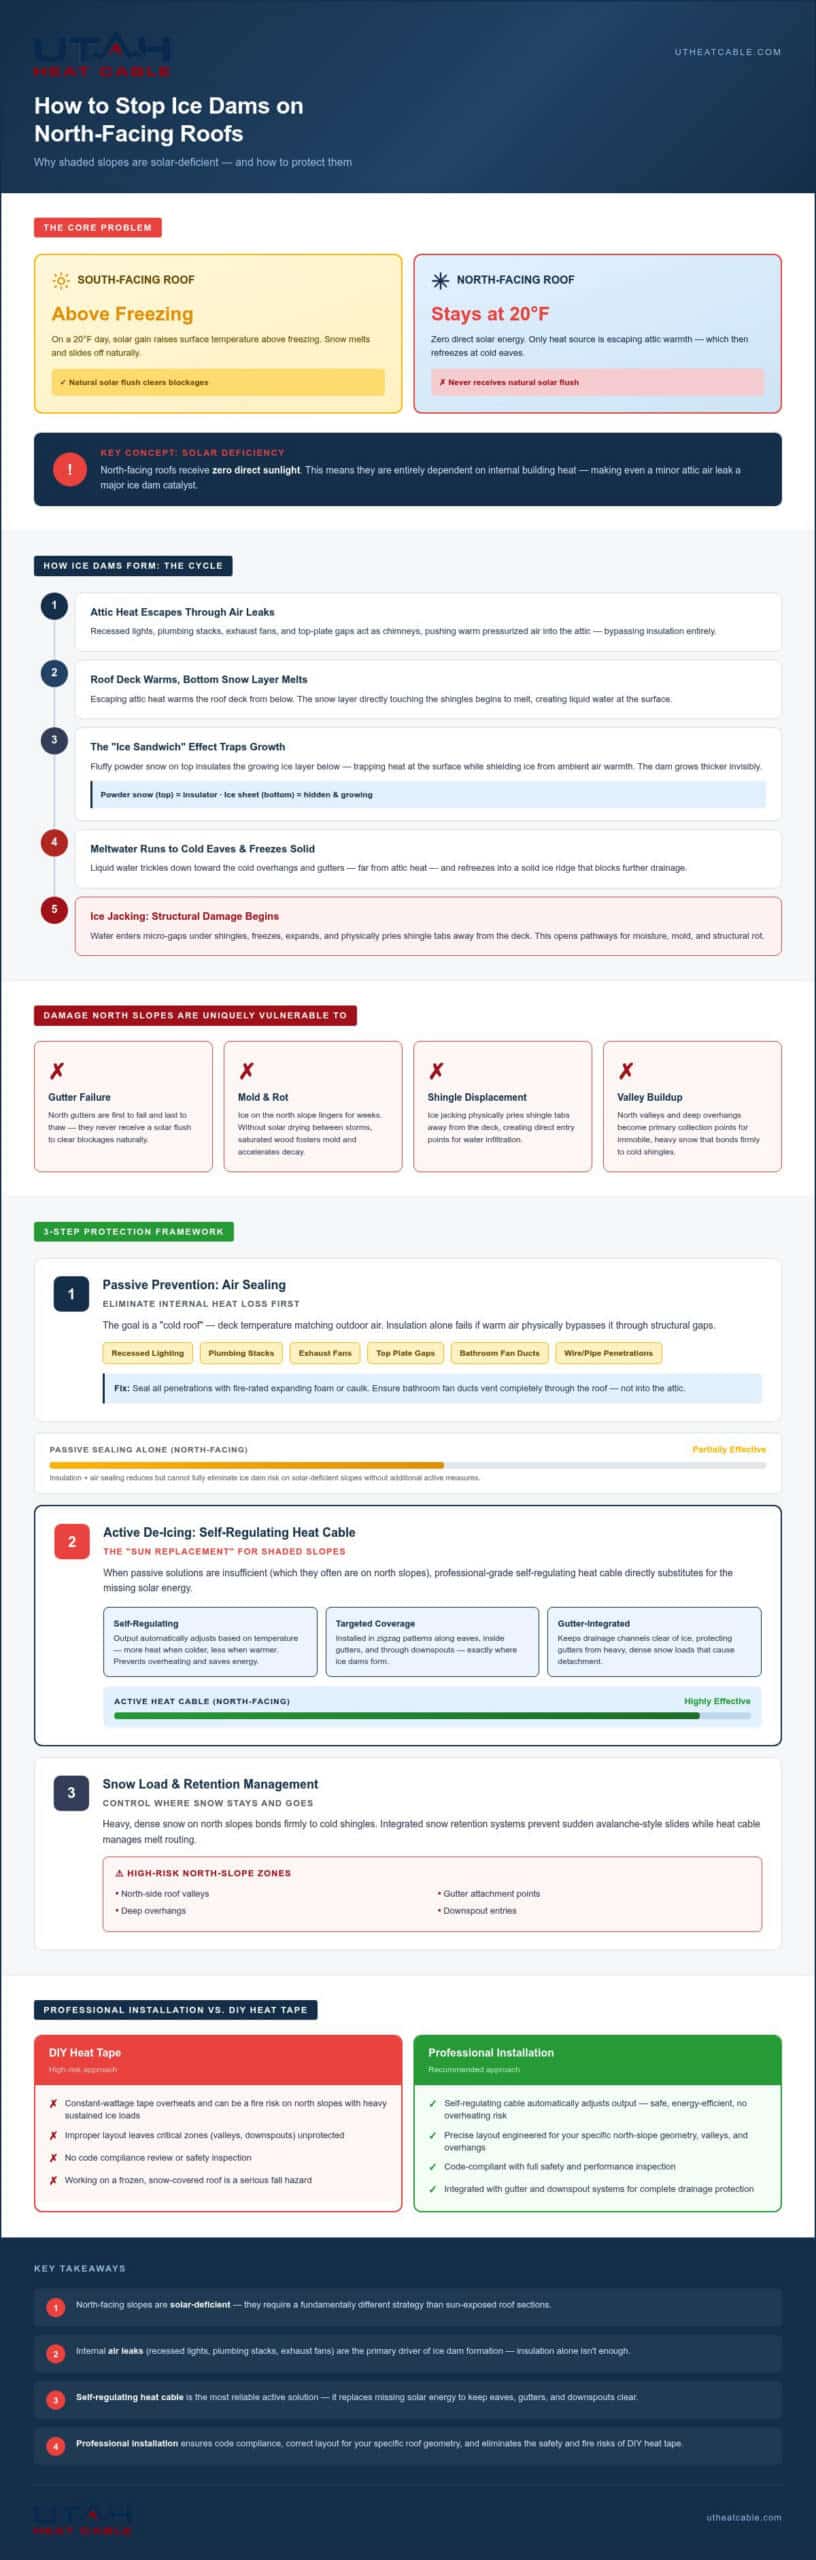
A north-facing ice dam is a specific structural challenge caused by the intersection of internal heat loss and a lack of solar assistance. On the south-facing side of your home, the sun acts as a natural ally, warming shingles and helping snow melt or slide off during the day. However, the north side suffers from “Solar Deficiency.” On this shaded slope, the sun never hits the surface directly, meaning the only heat reaching the roof deck comes from inside your home. When your attic isn’t perfectly sealed, this escaping warmth melts the bottom layer of snow, which then trickles down to the cold eaves and freezes into a solid block of ice. To fully understand what causes an ice dam to form even when outdoor temperatures remain well below freezing, it helps to examine the thermal imbalance between your living space and the roof deck above.
This process is often exacerbated by the “Ice Sandwich” effect. On shaded slopes, a thick layer of fluffy powder snow often sits on top of a growing ice sheet. This powder acts as a powerful insulator, trapping escaping attic heat at the roof surface while shielding the ice from any ambient warmth in the air. Because the ice remains hidden and insulated, it continues to grow thicker with every degree of heat lost from your ceiling. This cycle is why north-side gutters are often the first to fail and the last to thaw in the spring; they simply never receive the “solar flush” required to clear blockages naturally.
The Role of Solar Radiation in Roof Health
The temperature disparity between different sides of your home can be startling. On a 20-degree day, a south-facing roof can reach surface temperatures well above freezing through solar gain alone. In contrast, the north slope remains at the ambient 20 degrees. This lack of warmth means snow on the north side stays “sticky,” bonding firmly to the cold shingles rather than sliding toward the ground. High-risk zones, such as north-side valleys and deep overhangs, become primary collection points for this immobile, heavy snow. Learning how to stop ice dams on north facing roof sections requires addressing this specific lack of thermal energy.
The Danger of Chronic Moisture on North Slopes
Lingering ice is more than a winter nuisance; it’s a catalyst for long-term property damage. When ice remains on a north slope for weeks at a time, it leads to “ice jacking,” a process where water enters small gaps, freezes, and expands to pry shingle tabs away from the roof deck. This physical displacement allows moisture to seep into the underlying wood, fostering mold growth and accelerating shingle degradation. North-facing roofs are uniquely vulnerable to structural rot because they lack the solar heat required to dry out saturated building materials between storm cycles.
Step 1: Minimizing Internal Heat Loss (Passive Prevention)
The primary objective of passive prevention is to create a “cold roof.” This is a state where the temperature of your roof deck remains identical to the outdoor air. In the high-desert and mountain climates of Utah, Idaho, and Wyoming, this is a significant challenge. While building codes specify high R-values for attic insulation, thermal resistance alone cannot stop a dam if warm air is physically leaking into the attic space. On north-facing slopes, where the sun provides zero surface warming, even a minor air leak can become a major catalyst for ice formation.
North-side rooms often contribute more to this problem than homeowners realize. These areas frequently house bathrooms, kitchens, or utility rooms that require extensive ductwork and electrical penetrations. Recessed lighting, plumbing stacks, and exhaust fans act like small chimneys, allowing pressurized warm air to bypass your insulation. If you are investigating how to stop ice dams on north facing roof sections, you must first address these internal thermal leaks. Without air sealing, your insulation is essentially trying to keep a house warm while the windows are wide open.
Advanced Air Sealing for North-Side Attic Zones
Precision is required when targeting air bypasses on the shaded side of a home. You should focus on the top plates, which are the horizontal wooden members at the top of your exterior walls. Every gap where a wire or pipe passes through these plates must be sealed with fire-rated expanding foam or caulk. Bathroom fan ducts are particularly problematic; if they aren’t properly insulated and vented all the way through the roof, they release moist, warm air directly into the attic, causing localized melting on the north-side roof deck. If you find that your home’s structural layout makes passive sealing impossible, you may need to consider professional de-icing options to protect your property.
Optimizing Attic Ventilation
Effective ventilation serves as the secondary defense by flushing out any heat that manages to escape the living space. However, north-facing roofs face a unique obstacle: snow drifts. Because of prevailing winter winds, the north side of a home often accumulates the deepest drifts, which can completely bury soffit vents and cut off airflow. You must ensure that attic baffles are installed at every rafter bay to maintain a clear path for air to travel from the eaves to the ridge. Without this consistent airflow, even a well-insulated attic will eventually warm up enough to melt the bottom layer of snow on your roof.
Step 2: Installing Active De-Icing Systems (The “Sun Replacement”)
While air sealing and insulation create a necessary foundation, they often can’t compensate for the total lack of solar warmth on a shaded slope. In these cases, Self-Regulating Heat Cable serves as a professional “sun replacement.” This technology doesn’t just get hot; it mimics the sun’s role by providing targeted thermal energy to the eaves and gutters. When you are determining how to stop ice dams on north facing roof sections, you must realize that passive methods have a physical limit. An active system ensures that even when the temperature drops and the sun remains hidden, melt-water has a clear, liquid path to the ground.
Designing a system for the north side requires a more robust approach than south-facing sections. Because these areas stay colder for longer durations, the system must be engineered to handle a higher volume of snow and ice. A standard 5-step design process includes:
- Measuring the Overhang: Determining the exact depth of the “cold zone” where the roof extends past the heated walls.
- Calculating the Multiplier: Using the roof pitch to find the correct amount of cable needed for effective coverage.
- Mapping the Drainage: Identifying the downspouts that will carry the melt-water away from the foundation.
- Selecting Cable Wattage: Choosing a professional-grade output that can overcome extreme mountain cold.
- Controller Integration: Adding sensors that activate the system only when moisture and freezing temperatures are both present.
Self-Regulating vs. Constant Wattage for Shaded Areas
There is a significant difference between professional-grade cables and the thin “heat tape” found at local hardware stores. Cheap constant-wattage tapes often fail after a single season because they can’t handle the localized temperature fluctuations of a north slope. Self-regulating cables feature a specialized conductive core that expands or contracts at a microscopic level. When the roof is cold, the core contracts to allow more electricity to flow, generating more heat. As the roof warms, the core expands, naturally reducing power consumption. This internal intelligence makes them the only reliable choice for long-term protection.
Designing the “Zig-Zag” Pattern for North Eaves
The layout of the cable on your roof deck is critical for success. For north-facing slopes, the height of the zig-zag pattern should extend at least 12 inches past the interior wall line to ensure the “ice bridge” never forms. Simply tracing the eaves isn’t enough; the cable must also be run through the gutters and down into the downspouts. If the drainage path isn’t heated, the water will simply refreeze in the gutter, creating a heavy ice block that can pull the hardware right off the fascia. Professional 240V systems typically require a spacing of 12 inches between the peaks of the zig-zag pattern to ensure consistent melt-water channels.
Step 3: Managing Snow Load and Retention
North-facing snow is often significantly denser than snow on other parts of your home. Because it never sees direct sunlight, the snowpack undergoes a slow settlement process, becoming a heavy, icy slab that exerts immense pressure on your gutters. If you are investigating how to stop ice dams on north facing roof sections, you must account for this physical weight. Without proper management, this mass can shear off gutters or pull heat cables out of position during a mid-winter slide.
The primary danger on shaded slopes is the “gutter rip-off.” This occurs when a large volume of snow begins to move but is caught by the gutter trough. The resulting leverage can pull the gutter spikes or hangers right out of the fascia board. By installing a snow retention system, you keep the snow load distributed across the entire roof deck rather than concentrating it at the edge. This allows your heat cable to work efficiently, melting the base of the snowpack and creating drainage channels without the risk of the system being physically destroyed by falling debris. For communities managing multiple rooflines, a structured approach to ice dam prevention for HOAs can help coordinate snow retention and de-icing strategies across shared properties.
Snow Guards for North-Facing Metal Roofs
North-facing metal roofs are essentially avalanche zones. On a metal surface, the bond between the roof and the snow is weak; once a small amount of melt occurs at the base, the entire slab can slide at once. Snow guards act as a restraint system, holding the snow in place so your de-icing system can melt it gradually. This synergy is vital for protecting entryways, gas meters, and expensive landscaping from falling ice blocks. Positioning these guards correctly ensures that snow stays put until it’s safely converted into liquid runoff.
Gutter Reinforcement and De-Icing
Standard gutter installations often lack the structural support needed for the north side’s heavy ice load. We recommend adding extra hangers to ensure the fascia can support the combined weight of snow and frozen meltwater. Additionally, using automated Controller Options ensures your system activates before the north-side snow hardens into a solid, unmanageable block. Keeping the downspouts open is non-negotiable; if the vertical drainage path freezes, the water will back up and create a massive ice pillar that can collapse the gutter system entirely.
It’s also important to watch for “secondary ice dams.” These form when a heat cable pattern is too short, allowing ice to build up just above the heated eave line. On north slopes, the cable must extend high enough to reach the thermal boundary of the home’s interior walls. This prevents a ridge of ice from forming in the middle of the roof, which is often more difficult to clear than a standard eave dam.
Professional Installation: Ensuring Safety and Code Compliance
Determining how to stop ice dams on north facing roof areas is a technical challenge that extends beyond simple roof work into the realm of high-voltage electrical safety. While many homeowners are tempted by DIY kits found at local retailers, these products often lack the durability and safety features required for the extreme climates of the Rockies. Installing a de-icing system on a shaded, north-facing slope involves working in some of the slickest and most dangerous conditions on a property. Without professional equipment and training, you risk not only a failed system but also significant fire and shock hazards.
A licensed electrical contractor is essential for any professional de-icing project, especially when integrating 240V systems. These installations must adhere to strict National Electrical Code (NEC) requirements, specifically Article 426, which governs fixed outdoor electric de-icing and snow-melting equipment. Proper grounding and the use of ground-fault equipment protection (GFEP) are non-negotiable safety standards. Professional installers ensure that your home’s electrical panel can handle the load and that all circuits are dedicated and protected against the moisture-heavy environment of a winter roofline.
Why Custom Design Matters for North Slopes
Off-the-shelf heat tapes are typically designed with a “one size fits all” wattage that frequently underperforms in deep shade. Our team calculates the specific thermal output needed based on your north-facing micro-climate, taking into account elevation, typical snow density, and wind patterns. By using high-quality self-regulating heat cable, we provide a system that survives the constant freeze-thaw cycles that destroy cheaper alternatives. When paired with advanced controller options featuring moisture and temperature sensors, these systems operate with maximum efficiency, only drawing power when the weather actually demands it.
The Utah Heat Cable Advantage
Our experience across Utah, Idaho, and Wyoming has given us a deep understanding of the unique geographical challenges faced by mountain homeowners. We specialize in identifying and protecting complex north-side valleys and architectural “dead zones” where ice tends to accumulate. These areas require precision layout and specialized components that standard roofing contractors simply don’t carry. We don’t just lay cable; we design a comprehensive protective shield for your property that stands up to the harshest winter seasons.
Don’t wait for the next heavy storm to find out your passive insulation isn’t enough. Taking an active approach now will save you thousands in potential water damage and structural repairs later. Protect your north-facing roof with a custom heat-trace system from Utah Heat Cable and gain the peace of mind that comes with a professionally engineered, code-compliant solution.
Secure Your Home Against the Shaded Slope
North-facing slopes require more than just standard roofing logic; they demand a strategy that accounts for a total lack of solar assistance. You’ve seen how internal air sealing and proper snow retention provide the structural foundation for a safe winter. However, the most effective way to address how to stop ice dams on north facing roof areas remains the integration of professional-grade, self-regulating heat cable. This active solution provides the steady thermal energy needed to keep drainage paths open when the sun cannot reach the eaves.
As a licensed electrical contractor specializing in high-altitude heat-trace design, we understand the specific pressures homeowners face across Utah, Idaho, and Wyoming. Our custom self-regulating systems are engineered to handle the densest snow loads while meeting all modern electrical codes for safety and efficiency. Don’t let another winter of leaks and dangerous icicles compromise your property or your peace of mind. Get a Professional North-Side Ice Dam Evaluation from Utah Heat Cable today. With the right systems in place, you can enjoy the mountain winter knowing your home is fully protected by a solution built to last.
Frequently Asked Questions
Why do ice dams only form on the north side of my house?
Ice dams target the north side because these slopes are solar-deficient and never receive direct sunlight to help with natural melting. While the sun clears snow from southern slopes, the north side remains at ambient freezing temperatures. This causes any water melted by internal attic heat to refreeze instantly when it reaches the cold eaves, eventually building into a thick ice ridge.
Will adding more insulation in my attic stop north-side ice dams?
Insulation alone is rarely a total solution for shaded roof sections. While increasing your R-value helps, most ice dams on the north side are caused by air leaks that carry warm air into the attic space. Without perfect air sealing and an active “sun replacement” like heat cable, even a heavily insulated north roof can still develop stubborn ice ridges during a typical winter.
Can I install heat cables myself to save money?
DIY installation is generally discouraged because of the electrical and fire risks involved. Professional systems often require dedicated 240V circuits and specific ground-fault protection that meets National Electrical Code standards. Additionally, hardware store “heat tape” is typically lower quality and lacks the self-regulating technology needed for long-term performance in mountain climates.
How much electricity does a north-facing roof heat cable system use?
Energy consumption varies based on the system’s length and the outdoor temperature. Because self-regulating cables reduce their power draw as they warm up, they are far more efficient than older constant-wattage styles. Using an automated controller further reduces costs by ensuring the system only activates when both moisture and freezing temperatures are present.
What is the best type of heat cable for shaded roof areas?
Self-regulating heat cable is the superior choice for shaded environments. This cable features a conductive core that adjusts its heat output at every point along the line based on the local temperature. This ensures that the sections buried in deep north-side ice get the most power, while sections in clearer areas draw less energy to save on your monthly bill.
How long do professional roof de-icing systems last in Utah?
A professionally installed system using high-grade components can last 10 to 15 years. This durability far exceeds that of retail-grade products, which often degrade after just two or three winters. Regular inspections and the use of UV-stabilized materials help ensure your system remains a reliable part of your property’s winter protection for over a decade.
Do I need to run my heat cables all winter long?
You don’t need to run the system during dry periods or when temperatures are well above freezing. The goal is to provide a path for meltwater during active snow events and the subsequent freeze-thaw cycles. Automated sensors are the most effective way to manage this, as they turn the system on and off based on real-time weather conditions without any manual effort.
Can ice dams on the north side damage my gutters permanently?
Yes, the immense weight of north-side ice can easily pull gutter hangers out of the fascia or warp the metal troughs. When water freezes and expands inside a gutter, it can also burst seams and downspouts. Learning how to stop ice dams on north facing roof areas is essential for preventing these expensive structural repairs and maintaining your home’s drainage system. For a deeper look at the science of winter roof damage and what causes an ice dam to grow severe enough to destroy gutters, reviewing the underlying thermal mechanics can help you make a stronger case for active protection.