
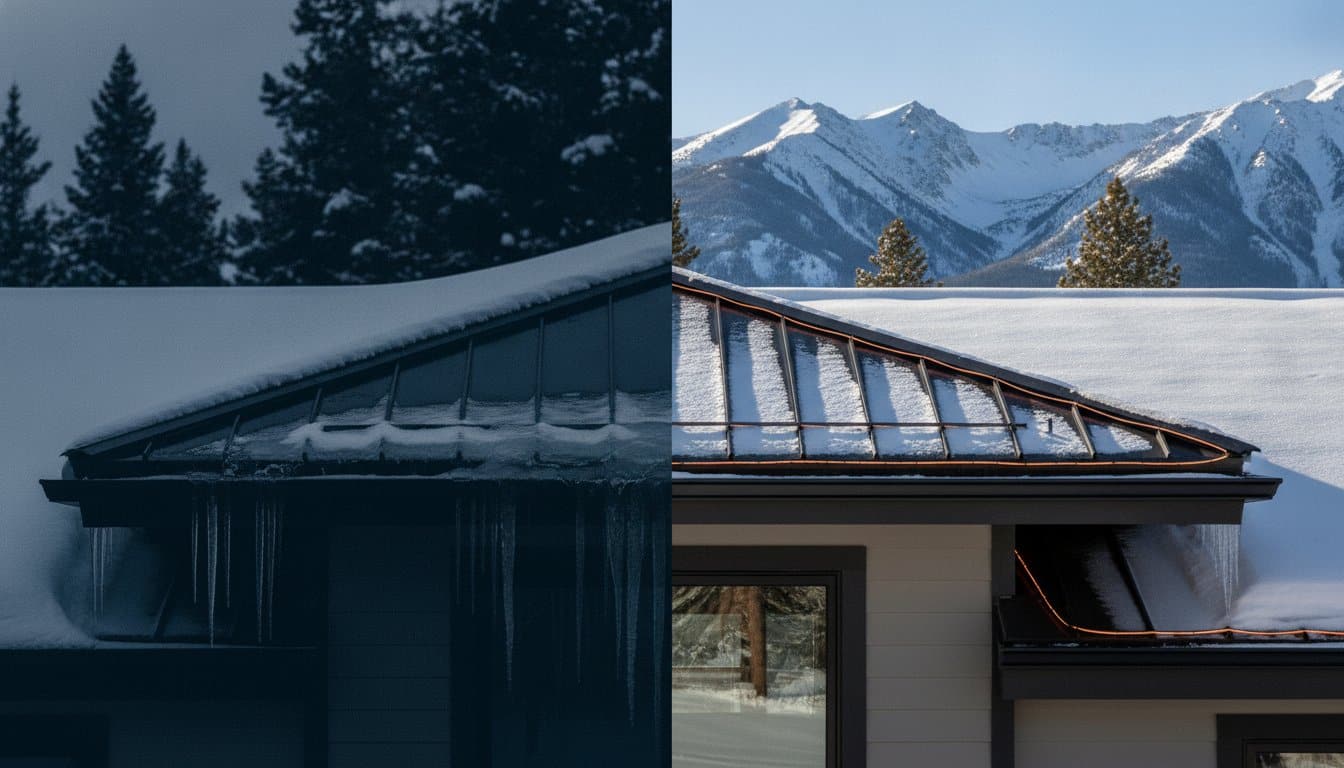
Imagine waking up after a heavy January storm only to find a spreading yellow stain on your living room ceiling. It’s a frustratingly common sight for mountain homeowners who struggle to prevent water damage from ice dams as the relentless freeze-thaw cycle takes hold. You’ve likely spent your weekends knocking down dangerous icicles or worrying if your roof can actually handle the next big dump of snow. We know that feeling of looking at your eaves with a sense of dread rather than appreciation for the winter scenery.
We understand the anxiety that comes with every major forecast and the confusion caused by conflicting advice on insulation versus heat tape. This 2026 guide is designed to cut through the noise and provide the professional strategies you need to protect your home’s structural integrity. You’ll learn how to implement a system that works automatically, from meeting the latest R-38 insulation mandates to installing professional-grade self-regulating heat cables. We’re going to walk you through the technical solutions that offer a dry home and total peace of mind, even during the harshest mountain winters.
Key Takeaways
- Learn how the “Warm Roof” phenomenon traps heat in your attic, forcing meltwater under shingles and into your interior walls.
- Understand the 2026 insulation standards and how proper ventilation creates a “Cold Roof” to minimize snow melt at the eaves.
- Discover why professional-grade self-regulating heat cables are the most reliable tool to prevent water damage from ice dams on complex or north-facing roofs.
- Identify the critical differences between temporary DIY heat tape and custom-designed systems that provide long-term structural protection.
- Learn why code-compliant installation and specialized controller options are essential for both fire safety and seasonal energy efficiency.
Understanding Ice Dams and the Critical Risk of Water Damage
Most homeowners see icicles and think of winter charm, but those frozen spears are often the first sign of a much deeper problem. What is an ice dam? Fundamentally, it’s a ridge of ice that forms at the edge of a roof and prevents melting snow from draining off. When snow on the upper parts of the roof melts due to escaping home heat, the water runs down until it reaches the cold eaves. It then refreezes, creating a physical barrier. This barrier is exactly why you must take steps to prevent water damage from ice dams before the first major freeze of the season.
As more snow melts, the water pools behind the ice ridge. It doesn’t just sit there. It finds the path of least resistance, which is often under your shingles and into your attic. Identifying the early warning signs can save you thousands in restoration costs. Look for these red flags during the winter months:
- Large, heavy icicles forming exclusively on the gutters or eaves.
- Visible “ice chunks” or solid blocks of ice filling your gutter system.
- Dark, damp stains appearing on interior walls or along ceiling corners.
- Ice forming behind the gutters or crawling down your home’s siding.
The Anatomy of an Ice Dam Leak
When water pools behind a dam, it creates hydrostatic pressure. This force pushes liquid water upward and under the overlapping layers of shingles, bypassing the roof’s natural shedding design. Standard gutters often exacerbate the problem because they provide a cold “shelf” for ice to accumulate. Once the water penetrates the roof deck, capillary action draws that moisture deep into your home’s interior, saturating wall studs and ceiling joists. This invisible progression means that by the time you see a drip, the structural damage is already well underway.
Health and Structural Safety Risks
The consequences of neglect extend far beyond a simple leak. Trapped moisture in drywall and insulation is a primary breeding ground for mold and mildew, which can compromise indoor air quality long after the snow melts. There’s also the physical weight to consider. A large ice dam can add hundreds of pounds of unnecessary stress to your roof trusses. Beyond the building itself, heavy icicles and sudden snow slides over entryways pose a significant safety hazard to your family and guests. Taking professional steps to prevent water damage from ice dams ensures your home remains a safe, dry sanctuary throughout the winter.
The Physics of Ice Dams: Why Your Roof Fails in Winter
To effectively prevent water damage from ice dams, you have to understand the thermal battle happening on your roof. This process starts with the “Warm Roof” phenomenon. When heat from your living space escapes into the attic, it warms the roof deck from underneath. If the temperature of the shingles rises above 32°F while the eaves remain in the sub-freezing air, you have the perfect recipe for a dam. The snow at the top melts, runs down the slope, and hits the cold gutter line where it instantly refreezes.
Snow itself plays a deceptive role in this process. While it looks cold, snow is a surprisingly good insulator. A thick layer of powder traps escaping attic heat against the shingles, accelerating the melting process even when the outside air is frigid. In our local mountain climate, rapid freeze-thaw cycles act like a pump. They constantly feed new meltwater into growing ice ridges. North-facing roofs and complex rooflines with multiple valleys are particularly vulnerable. These areas rarely see direct sunlight, meaning any water that migrates there will stay frozen until the spring thaw.
Common Sources of Heat Loss
Most attic heat gain isn’t just caused by thin insulation. It’s often the result of air leakage through bypasses. Recessed lighting cans, chimney flues, and unsealed attic hatches act like small chimneys, funneling your home’s warmth directly into the attic space. If your bathroom exhaust fan vents into the attic instead of through a dedicated roof jack, you’re pumping moisture and heat exactly where they shouldn’t be. Poorly insulated ductwork in unconditioned spaces can also radiate enough heat to warm the roof deck significantly.
External Factors: Solar Gain and Wind
The Utah sun is powerful enough to melt snow even when air temperatures are well below freezing. Wind also complicates the situation by drifting snow into roof valleys and crannies where it can’t easily shed. High-altitude solar radiation creates “false thaws” on south-facing slopes, where snow melts even in cold air, only to refreeze on shaded eaves. Because every home has unique thermal “hot spots,” a custom-designed system is often the most reliable way to address the specific physics of your roof’s architecture and prevent structural issues.
Passive Prevention: Insulation and Ventilation Strategies
Creating a “Cold Roof” is the primary goal of any passive strategy. This approach focuses on keeping the roof surface at the same temperature as the outside air to stop snow from melting at the source. As of July 1, 2026, Utah energy codes mandate a minimum R-value of R-38 for ceiling and roof insulation. This high level of thermal resistance is designed to keep your home’s heat inside the living space rather than letting it migrate into the attic. However, insulation alone is only half the battle. You also need a robust ventilation system to flush out any heat that does manage to escape.
Continuous airflow is usually achieved through a combination of soffit vents at the eaves and ridge vents at the peak. To ensure this airflow remains unobstructed, you must install baffles between the rafters. These channels prevent loose-fill or batt insulation from sliding down and blocking the eave vents. Without these baffles, even the most expensive insulation can’t prevent water damage from ice dams because stagnant, warm air will eventually heat the roof deck. While these strategies are effective in moderate climates, they often reach their functional limits in the Intermountain West during heavy snow years.
The Role of Ice and Water Shields
Many builders rely on ASTM D1970 compliant underlayment, often called an ice and water shield, as a safeguard. This self-adhering membrane is installed directly onto the roof deck before shingles are applied. It’s designed to create a watertight seal around nail penetrations. Industry standards typically suggest extending this barrier at least 24 inches inside the interior wall line. It’s vital to remember that an ice shield is a last line of defense, not a prevention tool. It doesn’t stop the ice from forming; it simply tries to manage the liquid water that pools behind the dam. If a massive buildup causes water to back up beyond that 24-inch protected zone, the shield will no longer protect your home from interior leaks.
When Passive Measures Aren’t Enough
Passive systems frequently fail in homes with vaulted ceilings, knee walls, or “un-fixable” attic spaces where there isn’t enough structural depth for both R-38 insulation and a proper air gap. Older Utah homes built before modern energy codes often struggle with these limitations. Even on a perfectly ventilated roof, extreme snow loads can physically bury ridge and soffit vents. When your ventilation is trapped under several feet of snow, the attic heat has nowhere to go. In these scenarios, passive strategies are overwhelmed, and active intervention becomes the only reliable way to prevent water damage from ice dams.

Active Prevention: Why Heat Cables are the Ultimate Defense
While insulation and ventilation provide a solid foundation, they often fall short during the deep freezes of a typical Utah winter. When passive measures are overwhelmed, active prevention becomes the only guaranteed way to prevent water damage from ice dams. This is where professional-grade self-regulating heat cable steps in as the ultimate line of defense. Unlike the thin, plastic-wrapped tapes found at big-box stores, these specialized systems are designed to physically melt drainage paths through the snow, allowing liquid water to reach the gutters and exit the roof safely.
If you have a metal roof, the challenge is even greater. High-altitude snow loads can suddenly release, sliding down the slick surface and tearing your heat cables right off the eaves. For this reason, integrating snow retention systems for metal roofs is a non-negotiable part of a comprehensive protection plan. These brackets hold the snow in place, protecting your investment and ensuring your drainage paths remain open throughout the season. Without retention, a single “roof slide” can destroy an entire active prevention system in seconds.
Self-Regulating vs. Constant Wattage Technology
The primary difference lies in how the cable manages energy. Self-regulating cables utilize a conductive core that becomes more resistive as it warms up. As ambient temperatures drop, the cable automatically increases its heat output to combat the cold. Conversely, constant wattage tape stays at the same temperature regardless of the weather. This makes it less energy-efficient and prone to burnout. Modern heat-trace controllers further enhance this efficiency by only activating the system when moisture and freezing temperatures are both present. Professional-grade cables are built with durable, UV-stabilized jackets that are designed to last for decades, whereas DIY alternatives often fail after just one or two seasons.
Gutter and Downspout Protection
Clearing the roof is only half the battle. If your gutters and downspouts remain frozen solid, the meltwater has nowhere to go and will simply refreeze on top of the dam. A complete system must include heat-trace lines within the gutters and down into the downspouts. We use a specific “J-Loop” technique at the bottom of the downspout to ensure water exits completely and doesn’t create a secondary ice hazard on your walkway. This total path protection prevents gutters from sagging or pulling away under the immense weight of frozen slush. To see how these systems can be tailored to your home, you can request a custom-designed heat-trace layout.
Implementing a Comprehensive Ice Dam Prevention Plan in Utah
A successful strategy to prevent water damage from ice dams in Utah isn’t a one-size-fits-all solution. Your home’s specific roof architecture, from north-facing gables to complex valley intersections, dictates where ice will likely accumulate. By combining the passive insulation and ventilation strategies discussed earlier with a targeted heat-trace system, you create a “bulletproof” defense. This multi-layered approach ensures that even when passive systems reach their limits during a record-breaking snow year, your home remains protected. It’s about building a system that responds to the environment automatically, providing security when you aren’t even there to monitor the eaves.
Preparation is key to long-term reliability. We recommend winterizing your roof with heat cable well before the first frost hits the Intermountain West. Waiting until snow is already on the shingles makes professional installation dangerous and often less effective. A code-compliant electrical installation is non-negotiable for any permanent system. Because these systems draw significant power, they must be designed to meet strict fire safety standards and local building codes, protecting both your structural investment and your family’s safety.
Professional Design and Installation
Licensed electrical contractors bring a level of precision that DIY installations simply lack. A master craftsman understands how to calculate specific load requirements for your home’s electrical panel. This prevents the common frustration of tripped breakers in the middle of a sub-zero night when you need the system most. We also prioritize automated controller options over simple manual switches. Sophisticated sensors detect both moisture and temperature, ensuring the system only runs when necessary. This precision preserves the longevity of the cable and keeps your seasonal energy costs manageable without sacrificing performance.
Long-Term Maintenance and System Care
Even the best-designed system requires occasional oversight to maintain peak performance. We advise a quick pre-season test every October to ensure your cables are heating correctly before the first major storm. It’s also vital to clear any late-autumn leaves or debris from your gutters before the snow flies. Organic material can create “hot spots” on the cable, which may lead to premature failure or reduced melting efficiency. Taking these small, methodical steps ensures your active prevention system is ready to prevent water damage from ice dams the moment the freeze-thaw cycle begins.
Protect your home this winter—Contact Utah Heat Cable for a professional design consultation.
Secure Your Structural Integrity for the Winters Ahead
Winter in the mountain west is beautiful, but it shouldn’t be a source of structural anxiety for your family. By understanding the thermal dynamics of your roof and moving beyond basic passive fixes, you can effectively prevent water damage from ice dams. True protection requires a multi-layered approach that combines current R-38 insulation standards with high-performance, self-regulating heat cables. These systems don’t just melt ice; they provide a dedicated drainage path that keeps your home dry when the freeze-thaw cycle is at its peak.
As licensed electrical contractors serving Utah, Idaho, and Wyoming, we specialize in custom-engineered heat trace systems designed for the unique challenges of high-altitude architecture. We’ve seen how professional-grade solutions outperform DIY tapes, offering a permanent shield against the elements. Don’t wait for the yellow stains to appear on your ceiling or for heavy snow to overwhelm your eaves. Taking action now ensures your home remains a safe, dry sanctuary all season long. We take pride in delivering precision and reliability to our neighbors across the region.
Secure Your Home with Utah’s Ice Dam Experts and gain the peace of mind that comes from professional-grade protection.
Frequently Asked Questions
Can I install heat cables myself or do I need a professional?
You should hire a professional, specifically a licensed electrical contractor. DIY kits often lack the durability of professional-grade cable and don’t account for complex electrical loads. A specialist ensures code compliance and proper circuit protection, which is vital for fire safety. Professional installation also guarantees that the layout is custom-designed for your specific roof valleys and eaves, providing a long-term solution rather than a temporary fix.
Does a new roof with an ‘ice and water shield’ mean I won’t get ice dams?
No, an ice and water shield does not stop dams from forming. It is a waterproof membrane designed to catch leaks after a dam has already developed. While it protects the first few feet of your roof deck, water can still back up beyond the protected zone and enter your home. To truly prevent water damage from ice dams, you need active measures like heat cables that keep the drainage paths clear.
How much electricity do roof heat cables actually use in a Utah winter?
The energy consumption depends on your system’s length and the type of controller used. Professional self-regulating cables adjust their power draw based on the temperature, pulling more power only when it’s freezing. Using automated sensors ensures the system only activates when both moisture and cold are present. This intelligent management keeps your utility bills manageable while providing the necessary protection during the heavy snow cycles common in Utah and Idaho.
What is the difference between heat tape and self-regulating heat cable?
Heat tape is a constant-wattage product that stays at one temperature, which often leads to burnout or wasted energy. Professional self-regulating heat cable uses a specialized core that varies its heat output based on the surrounding air temperature. This technology is more durable, safer for your shingles, and significantly more energy-efficient. It’s the difference between a temporary, high-maintenance patch and a permanent, industrial-grade protection system for your mountain home.
Can ice dams cause my roof to collapse from the weight?
Yes, massive ice accumulations can put extreme stress on your roof trusses. While most modern homes are built for heavy snow loads, ice is much denser and heavier than powder. A single cubic foot of ice weighs about 57 pounds. When hundreds of pounds of ice build up on your eaves, it can lead to structural sagging or even failure. Removing the snow and using heat cables prevents this dangerous weight from accumulating.
Will cleaning my gutters prevent ice dams from forming?
Cleaning your gutters is a necessary maintenance step, but it won’t stop the physics of an ice dam. Debris-filled gutters can make dams worse by trapping water, but the primary cause is escaping attic heat. Even perfectly clean gutters will fill with ice if the meltwater from your roof refreezes at the cold eave. Gutters should be clear to allow the heat cables to create an open channel for water to escape.
How do I stop ice dams on a north-facing roof that never gets sun?
North-facing roofs are ice magnets because they never benefit from solar melting. These areas require a robust, active heat-trace system to prevent water damage from ice dams. Since the sun won’t help clear the snow, the self-regulating cable must do all the work. We often design more intensive cable patterns for these shaded slopes to ensure that drainage paths remain open even during prolonged periods of sub-freezing temperatures.
What should I do if I already have a massive ice dam and my roof is leaking?
Your first priority is a professional de-icing service using low-pressure steam. Never use a hammer, shovel, or salt pucks, as these can easily destroy your shingles and gutters. Steam is the only safe way to melt through the ice without damaging the roof deck. Once the ice is removed and the leak is addressed, you should consult with a specialist to install a permanent heat-trace system to ensure the problem doesn’t return.