
Pavers are the visible finish, but snow melting happens below them. A snow melt system for paver driveways typically places electric heating cable or hydronic tubing beneath the surface, within a layered assembly that supports the pavers and transfers heat upward. The base matters too: uneven settling can affect both the pavement and the system.
It’s reasonable to want to know what goes under the driveway before committing to the project. This guide explains how the main system types work, how the paver layers and layout influence performance, and what to consider when planning an installation. You’ll also learn how automatic controls can respond to snow and freezing conditions, and how a professionally planned driveway deicing system can help keep the surface clearer through winter in Northern Utah and along the Wasatch Front.
Key Takeaways
- A dependable paver installation starts with a stable, well-prepared base that helps limit uneven settling and protects the system below.
- Electric heating cable layout, coverage, and the materials placed above it all affect how heat reaches the paver surface.
- System design should account for the area to be heated and its electrical requirements, rather than relying on a one-size-fits-all layout.
- Automatic controls and driveway deicing services can help manage winter conditions across driveways and walkways in Northern Utah and the Wasatch Front.
Why Install Snow Melting Under Pavers?
A heated paver surface can melt snow where it lands, reducing the need to clear accumulated snow by hand. A snow melt system for paver driveways places electric heating elements or hydronic tubing beneath the pavers. Heat rises through the paving material and warms the surface. The layers above the system matter because they affect how efficiently heat reaches the pavers.
Automatic snow and ice controls use a sensor to detect surface temperature and moisture. When it senses precipitation and freezing temperatures, the controller can activate the system and switch it off when temperatures rise above freezing. This can be more responsive than relying only on a timer, which may not match changing winter conditions in Utah.
Sensor-based controls and manual controls serve different needs. With automatic weather-sensing controls, the sensor detects conditions at the heated surface and signals the controller. A manual control requires an operator to start or stop heating, so the system’s operation depends on someone noticing the conditions. Some controller options may include both automatic and manual operation; the selected setup determines how the system responds to snowfall. A clear plan should also account for the sensor’s location, since it needs to detect relevant surface conditions.
System choice also depends on the paving material. Hydronic systems circulate heated fluid through tubing, while electric systems use heating cable beneath the pavers. Hydronic snowmelt systems cannot be installed beneath asphalt, so asphalt requires another approach. Matching the heating method and controller to the driveway surface helps coordinate the paving, heating, and controls.
Electric heating cables for outdoor surfaces
Electric cables warm pavers directly, while hydronic systems circulate heated fluid through tubing. The right snow-melting system depends on the surface, planned layout, and available electrical capacity.
Base Preparation and Cable Placement
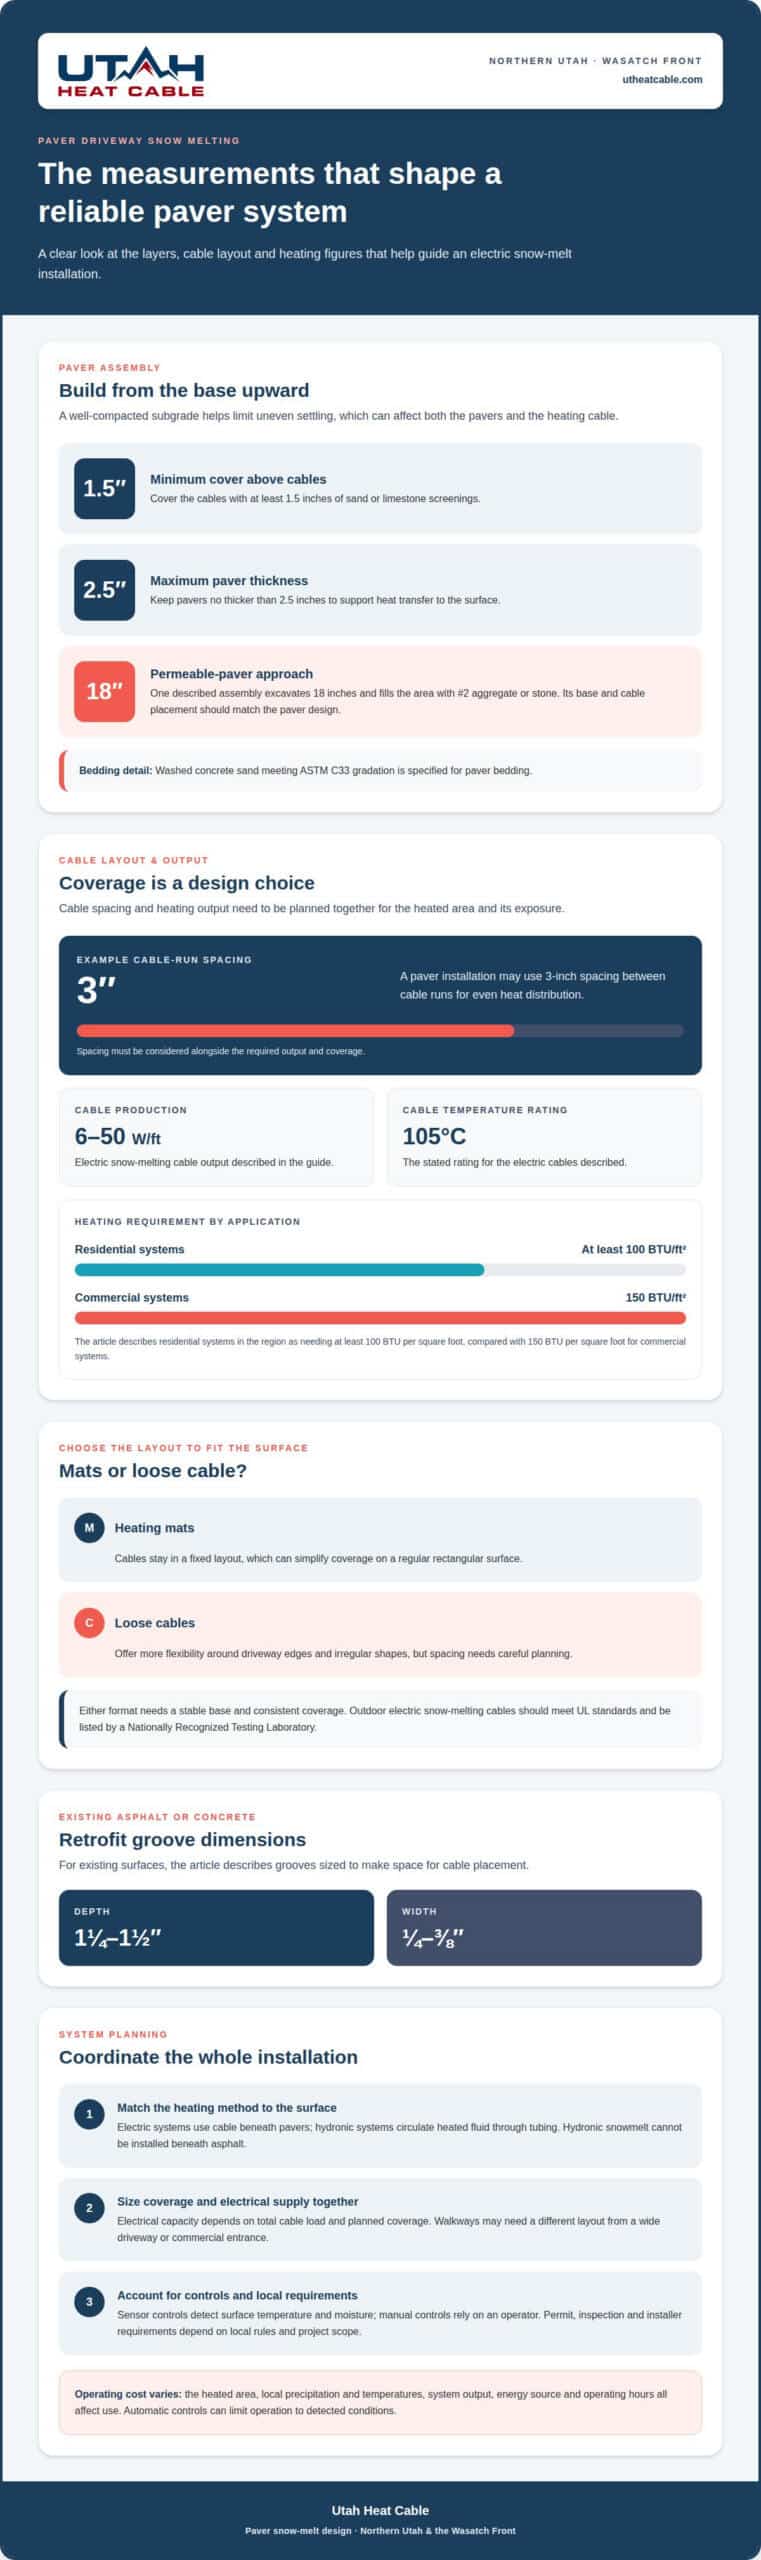
Begin with a well-compacted subgrade; uneven settlement can stress both pavers and heating cable. Place cables over the prepared base, then cover them with at least 1.5 inches of sand or limestone screenings. Washed concrete sand meeting ASTM C33 gradation is specified for paver bedding. Keep pavers no thicker than 2.5 inches to support heat transfer.
For permeable pavers, one described approach excavates 18 inches and fills the area with #2 aggregate or stone. That assembly differs from standard bedding, so the base and cable placement should match the paver design.
Heating Mats Versus Loose Cables
Heating mats hold cables in a fixed layout, which can simplify coverage on a regular rectangular surface. Loose cables offer more flexibility around driveway edges and irregular shapes, but their spacing needs careful planning. Either way, the heating element needs a stable base and consistent coverage beneath the heated area.
Outdoor electric snow-melting cables should meet UL standards and be listed by a Nationally Recognized Testing Laboratory. Confirm that the cable format suits the driveway shape and paver assembly.
Heating Output and Cable Spacing
A paver installation may use 3-inch spacing between cable runs for even heat distribution. Electric cables described for snow melting produce 6-50 W/ft and are rated at 105 °C. The required output depends on the heated area and its exposure; residential systems in the described region need at least 100 BTU per square foot, compared with 150 BTU per square foot for commercial systems.
Plan spacing and output together, rather than selecting either in isolation. To plan a layout for a driveway or walkway, request a deicing system plan.
Custom installation plans and electrical requirements
An electric snow-melting system passes current through heating cable beneath the paved surface. The cable warms the pavers, helping melt snow where the system is installed. The project plan should coordinate the heated area, cable layout, electrical supply, and controls. Walkways may need a different layout from a wide driveway or commercial entrance.
Permit, inspection, and installer requirements depend on local rules and project scope. The system layout alone does not determine these requirements; local authorities set them for each project.
There is no single operating cost per winter for every driveway. Usage depends on the heated area, local precipitation and temperatures, system output, energy source, and operating hours. Automatic controls can limit operation to detected conditions, while manual controls rely on someone switching the system on.
Uneven settlement is a key installation risk because it can affect both pavement and buried components. A well-compacted subgrade helps reduce that risk. Before winter, operating checks can help confirm that the controls respond and the heated area works as intended.
Electrical capacity must match the system’s total cable load and planned coverage. The required supply depends on those design details, so a plan should account for the driveway and any connected walkways. For existing asphalt or concrete, electric retrofit grooves are described as 1+1⁄4 to 1+1⁄2 inches deep and 1⁄4 to 3⁄8 inches wide. Those dimensions provide space for cable placement within the existing surface.
Custom planning coordinates electrical components, cable routes, and the areas that need snow melting. This helps align installation details with the property layout and how it is used in winter.
Utah Heat Cable: Roof Snow Retention
Utah Heat Cable offers Roof Snow Retention for properties managing snow on roofs as well as paved areas. Roof snow retention addresses a different part of the property than a heated paver driveway. Sidewalk and Driveway De-Icing Systems target snow and ice on pedestrian and vehicle surfaces.
For homes and businesses across Northern Utah and the Wasatch Front, the next step is to match the system to the surface and the area that needs protection. De-Icing Services and Controller Options can support a planned approach to managing snow and ice around driveways and walkways. If you’re planning a paver project, consider how the driveway connects with roof runoff paths and nearby pedestrian routes.
Contact Utah Heat Cable to discuss your property’s snow and ice protection needs.
Plan Your Winter Access Before the Next Storm
Start by identifying the paved areas that matter most to your daily routine, such as the garage entrance, driveway approach, or path to the front door. That gives a snow melt system for paver driveways a clear purpose and keeps the plan focused on how you use the property. Consider how roof snow management and pedestrian access fit into your wider winter plan.
Utah Heat Cable offers Self Regulating Heat Cable, Constant Wattage Heat Cable, and De-Icing Services. These options support different property needs, from heated surfaces to broader snow and ice management. Planning ahead gives you time to decide which areas need attention before winter weather arrives.
Take the next step toward a winter plan shaped around your property and its everyday access needs.
A thoughtful plan can make winter access easier to manage.
Frequently Asked Questions
What’s under the driveway?
Beneath the pavers are a prepared base, heating elements, and bedding material. An electric design places heating cable beneath the pavers; a hydronic design uses tubing that carries heated fluid. The surface layers protect those components and allow heat to move upward. The arrangement depends on the paving style, heating method, and whether the design uses standard or permeable pavers.
How do snow melt systems work under paver driveways?
Electric systems warm the surface through resistance heating in buried cable. Hydronic systems circulate heated water mixed with propylene glycol through a closed tubing loop. A temperature-and-moisture sensor can signal an automatic controller when conditions call for heat. The controller can also stop operation when temperatures rise above freezing, limiting unnecessary heating as winter conditions change.
How should pavers and the snow melt system be designed and installed together?
Plan the paving assembly and heat layout as one project, so the base, bedding, and surface work together. For permeable pavers, one described approach uses an 18-inch excavation filled with #2 aggregate or stone. The paver design and drainage requirements affect that assembly. Coordinate cable or tubing routes before laying the finish surface to avoid disrupting the planned coverage.
What heating cable or tubing spacing and depth are recommended under driveway pavers?
Electric cable runs are described at 3-inch spacing, while typical hydronic tubing spacing is six to eight inches. For cable coverage, the stated paver installation calls for at least 1 inch of mortar or 1.5 inches of sand or limestone screenings above the heating elements. Pavers should be no thicker than 2.5 inches to support heat transfer.
What electrical capacity or boiler size is needed for a paver driveway snow melt system?
Electrical capacity depends on the cable’s total connected load and the area being heated; the system design must match the available supply. For hydronic systems, boiler output depends on the calculated heat demand and tubing layout. As design benchmarks, the described regional guidance uses at least 100 BTU per square foot for residential systems and 150 BTU per square foot for commercial systems.