
An existing driveway can be heated, but the system needs to be built into a replacement surface, not laid over finished pavement. Electric snow melt system installation involves removing the existing surface so heating elements can be embedded beneath the new concrete, asphalt, or pavers.
Replacing the surface is a key part of a retrofit. The right layout depends on the driveway material and the areas you want to keep clear. If you do not need full coverage, heating selected tire lanes or high-traffic sections may be an option.
This guide covers the main installation stages, differences between concrete, asphalt, and pavers, and how electric snow melting can help maintain safer access and limit snow and ice buildup on treated areas. It also explains what to plan for, from removing the old surface and preparing the base to making the electrical connection.
Key Takeaways
- A retrofit can target tire lanes or high-traffic areas, so consider where snow and ice create the biggest access concerns.
- Automatic controls use sensors to signal relay panels, which manage power to the heating system.
- Ground-fault protection is an important part of outdoor system design, while heated areas can help limit snow and ice buildup.
- Plan for surface removal, base preparation, cable or mat placement, new paving, and the final electrical connection.
Why Install Driveway Electric Snow Melting?
Automatic controls let a snow-melting system respond to winter conditions detected by sensors, rather than relying only on manual switching. When comparing controls, consider how sensors, relays, and settings work together to activate heating and manage drying.
Automatic Snow and Ice Controls
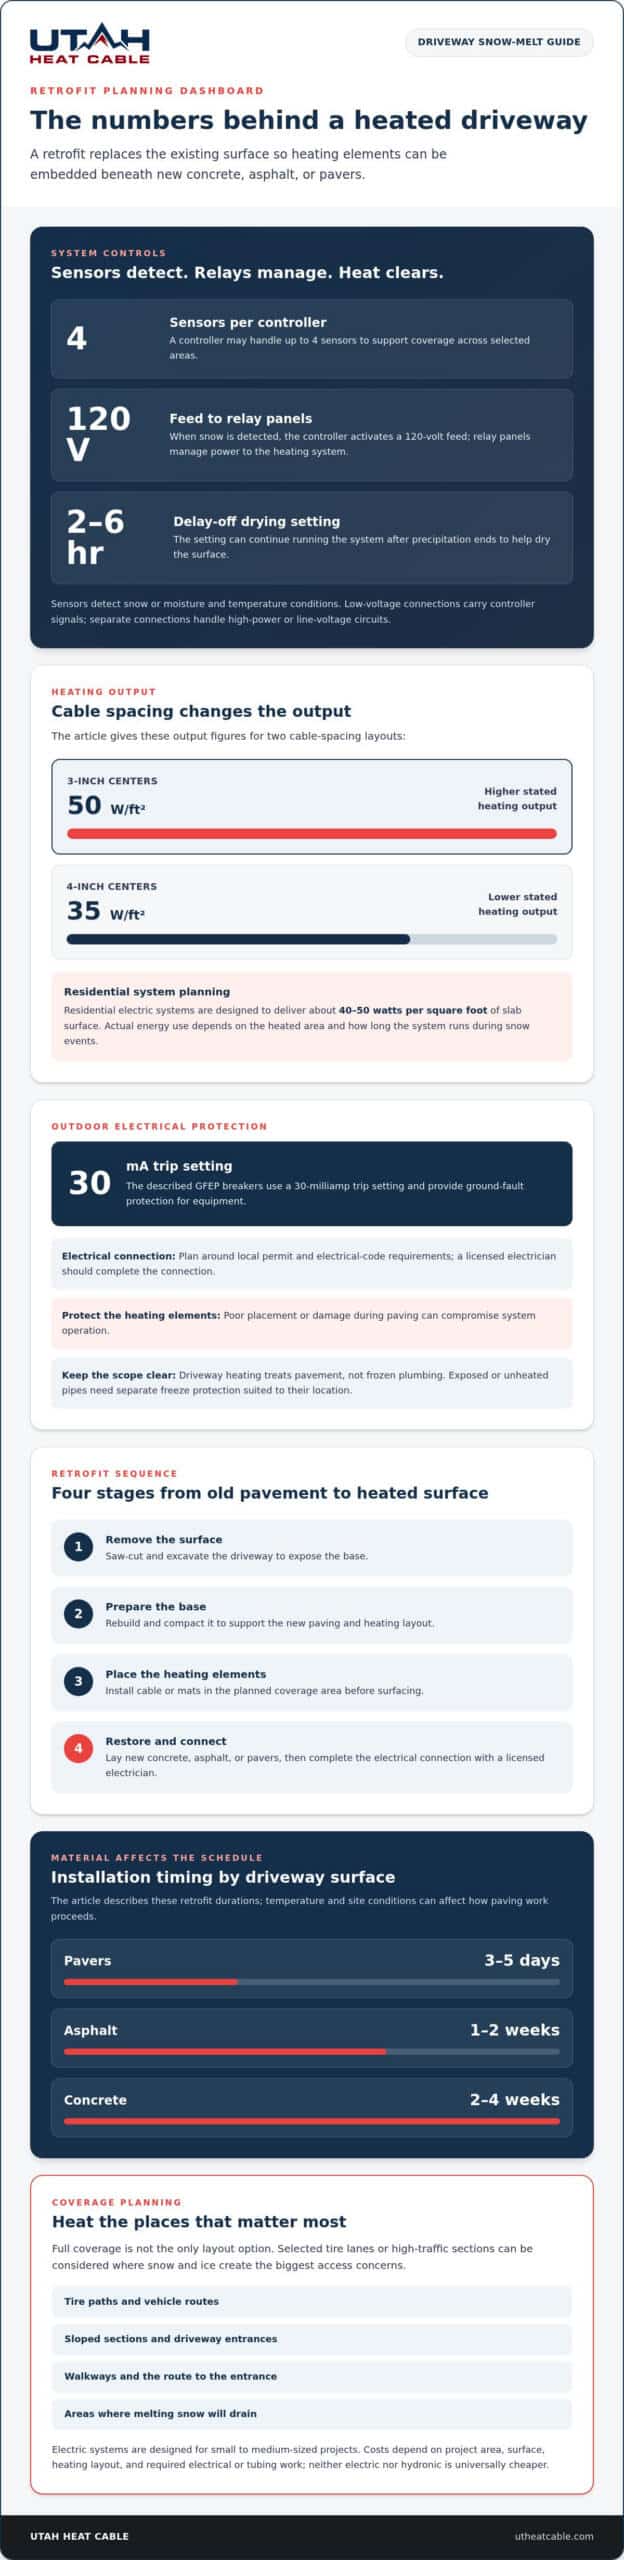
Sensors detect snow or moisture and temperature conditions, allowing the controller to signal the relay panels. Each driveway snow-melting controller may handle up to 4 sensors, which can support coverage across selected areas. The controller uses low-voltage connections for its signals, while separate connections handle high-power or line-voltage circuits. When snow is detected, the controller activates a 120-volt feed to the relay panels, which manage power flow. A 2-to-6-hour delay-off setting can continue drying the surface after precipitation ends.
Installation Cost Factors
Electric systems are designed for small to medium-sized projects; hydronic systems circulate glycol through tubing embedded in concrete or beneath pavers. Their costs depend on the project’s area, surface, heating layout, and required electrical or tubing work, so neither method is universally cheaper. For a U.S. driveway, the per-square-foot price depends on the project and is provided after a quote request; coverage area, materials, surface replacement, and electrical requirements affect the estimate. Cable spacing also changes heating output: 3-inch centers provide 50 watts per square foot, while 4-inch centers provide 35 watts per square foot.
Operating Costs and Energy Use
Residential electric systems are designed to deliver about 40 to 50 watts of heating power per square foot of slab surface. Actual energy use depends on the heated area and how long the system runs during snow events. Automatic sensors start operation in response to detected conditions, while a delay-off setting extends operation for drying. For practical planning, compare the system’s total installed load and expected operating hours, rather than treating heating output as a complete energy bill.
Safety and pavement protection benefits
Electric snow melting warms selected pavement to help clear snow and ice from vehicle and pedestrian routes. By reducing buildup, it can lessen the need for shoveling or scraping, which may wear pavement over time. It can also help limit slippery patches near driveway entrances and along walkways.
Outdoor electrical protection matters. Ground-fault equipment protection (GFEP) breakers in the described installation use a 30-milliamp trip setting. They provide ground-fault protection for equipment and are presented as essential for outdoor snow-melting systems. Proper cable placement and protection during paving also matter: misplaced or damaged heating cable can compromise system operation.
Permit and electrical-code requirements vary by U.S. jurisdiction and project scope. Plan around local requirements, and have a licensed electrician complete the electrical connection. Common installation mistakes include positioning heating elements poorly, damaging them during resurfacing, and overlooking electrical load or ground-fault protection.
A heated driveway treats snow and ice on the pavement, not frozen plumbing. Pipes in exposed or unheated areas need separate freeze protection suited to their location, because driveway heating will not protect them. Keep these needs distinct when planning winter protection for your property.
For a practical layout, consider where people walk, where tires travel, and where melting snow will drain. Design the driveway de-icing system around the areas that need treatment and the electrical protection required for the installation.
Driveway snow-melt installation stages
An electric system warms pavement using heating elements embedded beneath the surface. It can go under concrete, asphalt, or pavers, but a retrofit requires removing and replacing the existing driveway. Begin planning by choosing the replacement surface and marking the areas that need heat.
For a winter retrofit, the main stages are:
- Remove the surface: Saw-cut and excavate the driveway to expose the base.
- Prepare the base: Rebuild and compact it to support the new paving and heating layout.
- Place the heating elements: Install cable or mats in the planned coverage area before surfacing.
- Restore and connect: Lay the new concrete, asphalt, or pavers, then complete the electrical connection with a licensed electrician.
Material affects the work schedule. A paver driveway retrofit is described as taking 3-5 days; asphalt takes 1-2 weeks, and concrete takes 2-4 weeks. Temperature and site conditions can shape how paving work proceeds, so the surface sequence matters as much as cable placement. If you are coordinating new pavers with surrounding hardscaping or outdoor construction, specialists like Cascade Outdoor Services can help ensure solid base preparation and quality installation.
Choose an installer who provides a clear plan for excavation, base compaction, heating-element placement, replacement paving, and the electrical connection. The plan should identify the areas to heat, such as tire lanes, and show how the elements will suit the driveway material. For a project-specific next step, explore driveway de-icing systems.
Utah Heat Cable: De-Icing Services
Utah Heat Cable provides de-icing services for property owners looking to reduce snow and ice buildup on driveways and walkways. If your existing driveway needs replacement, its Sidewalk and Driveway Deicing Systems can be part of planning heated coverage beneath the new surface. Controller options can also be matched to the project’s needs.
Start with the areas that cause the most difficulty, such as tire paths, sloped sections, or the route from the driveway to the entrance. This gives the installation plan a practical focus and helps guide decisions about coverage and controls. Explore driveway de-icing systems, or visit Utah Heat Cable to discuss your project.
Prepare Your Driveway for the Next Winter
Plan electric snow melt system installation around how you want to manage winter conditions at your property. Consider whether your priority is reducing snow and ice on the driveway, choosing a heat-cable type, or coordinating de-icing with other property needs. Settling these priorities before work begins gives the project a clear direction.
Utah Heat Cable offers Self Regulating Heat Cable, Constant Wattage Heat Cable, and de-icing services. These options address different heating and snow-management needs, with the right approach guided by your property and project goals.
Take the next step by outlining which surfaces need attention and what you want the system to accomplish. Explore Utah Heat Cable’s de-icing options and start planning a more winter-ready driveway.
Frequently Asked Questions
Can you add a heated driveway to an existing driveway?
Yes, but a retrofit requires removing the existing pavement and installing the heating system beneath a replacement surface. Before work begins, decide between full coverage and targeted heating, such as tire lanes or the path to a garage. This layout aligns heated areas with the routes you use every day.
How long does a snow melting system take to melt snow?
Melting time varies with snowfall, outdoor temperature, pavement conditions, heated coverage, and system output. Light snow over a warmed tire lane clears differently from deep, wind-driven snow across a cold driveway. Automatic controls can respond to detected snow or moisture, while system layout and operating settings influence how quickly treated areas clear.
Should I use snow melting mats or snow melting cables?
Mats arrive pre-assembled, which can simplify placement in a defined area. Available mat formats include 2-foot or 3-foot widths and lengths up to 60 feet. Bulk cable allows a layout to follow a less uniform shape, such as separate tire tracks. Choose based on the coverage pattern, surface design, and space available for connections.
What are the steps to install an electric snow melting system in a driveway or walkway?
Start by mapping the driveway or walkway zones that need heating, including transitions between surfaces. Remove the existing paving, prepare and compact the base, position the heating elements, and install the replacement surface. A licensed electrician completes the electrical connection. If a walkway runs beside the driveway, coordinate both layouts before excavation.
What electrical service, circuit, and amperage are required for an electric snow melt system?
Required service and circuit sizing depend on the heated area, cable or mat output, system voltage, and available electrical capacity. Snow-melting mats and bulk cables are offered in voltages from 120 to 600 volts. The design determines circuit needs and amperage; outdoor systems also require equipment ground-fault protection, including the described 30-milliamp GFEP breaker setting.