Imagine waking up to the sound of your gutters groaning under the weight of solid ice, only to realize the bargain heat tape you installed last October has already failed. It’s a common frustration for homeowners in the Intermountain West who deal with recurring ice dams and the structural damage they leave behind. You likely already know that a standard hardware store solution isn’t enough to protect your roof through a harsh mountain winter. To truly secure your property, you need a professional gutter de-icing cable installation designed for durability and high-performance efficiency.
We understand the peace of mind that comes from knowing your home is shielded against the heaviest snowfalls. This 2026 expert guide will show you how to design a professional-grade system that prevents ice dams before they start. You’ll learn the critical differences between self-regulating and constant wattage cables, the latest 2026 NEC safety requirements for GFCI protection, and the step-by-step process for a layout that keeps your gutters clear and functional all winter long.
Key Takeaways
- Identify how a properly engineered system breaks the ice dam cycle by creating a clear, managed path for meltwater to exit your roof safely.
- Compare the benefits of self-regulating technology against constant wattage cables to ensure your home remains protected without wasting energy.
- Learn the exact layout and measurement steps required for a successful gutter de-icing cable installation; this includes covering both roof edges and downspouts.
- Navigate the 2026 electrical code updates, including the requirement for dedicated circuits and specialized GFEP breakers to maintain system safety.
- Establish a seasonal inspection plan to verify your system’s integrity and performance before the first mountain snowstorm arrives.
Understanding Gutter De-Icing: Why Your Home Needs a System
A gutter de-icing system isn’t just about melting snow; it’s an engineered drainage strategy. Many homeowners assume the goal is to clear the entire roof of white powder, but that’s a common misconception. Instead, professional Trace heating technology creates a reliable, managed path for meltwater to escape. By maintaining a clear channel, you ensure that liquid water moves from the roof surface, through the gutter, and out of the downspout before it has a chance to refreeze. Without this dedicated path, your home becomes vulnerable to the destructive cycle of ice expansion.
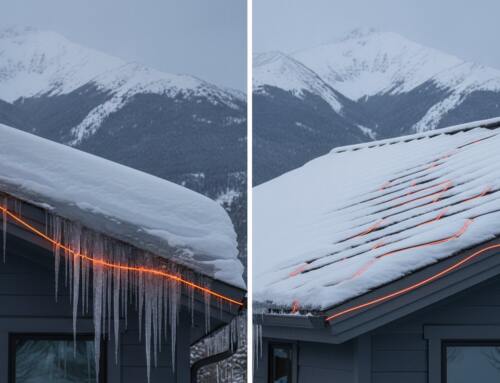
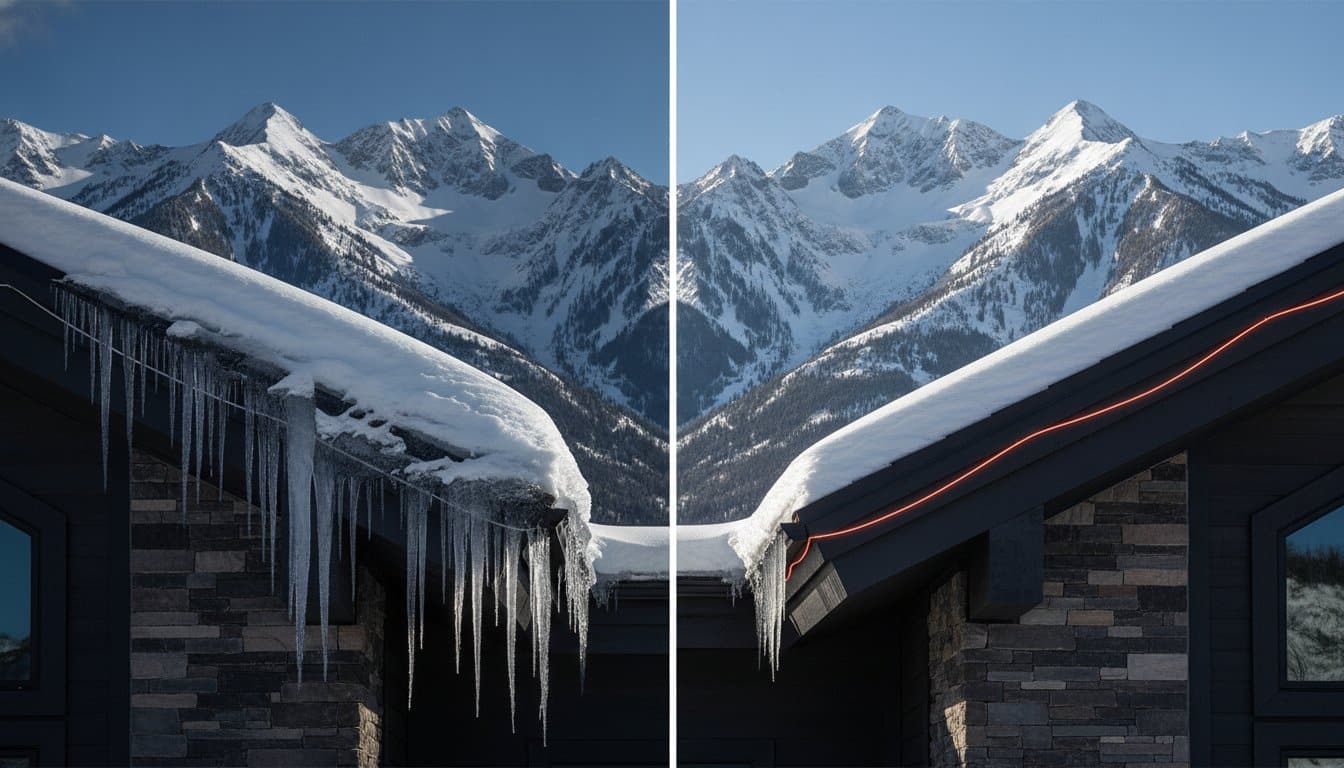
This process is vital because of the “Ice Dam Cycle.” Heat escaping from your attic melts the bottom layer of snow on your roof. That water trickles down to the cold eaves where it hits freezing temperatures and turns back into ice. Over time, this creates a literal dam that holds back pools of liquid water. If your gutters are already full of frozen debris or ice, they provide the perfect foundation for these dams to grow. In the heavy snow regions of Utah and Wyoming, these dams can become massive, putting thousands of pounds of pressure on your home’s structure. A professional gutter de-icing cable installation is the most effective way to break this cycle by protecting the critical gutter-to-roof transition.
The Role of Gutters and Downspouts in Winter
Frozen gutters do more than just look heavy. They trap water that eventually seeps under shingles, causing wood rot and interior leaks. You might also notice “ice spears” or heavy icicles forming on the gutter edges. These are clear indicators that your drainage path is blocked. The downspout is actually the most critical part of the system; if the vertical path isn’t heated, the water from the roof will simply freeze at the top of the pipe and back up into the gutter, rendering the entire system useless.
Signs You Need a Professional De-Icing System
You can often spot the need for a system before a major leak occurs. Look for “ice bridging,” where a solid sheet of ice grows completely over the top of the gutter. This means the gutter is no longer collecting water and is instead acting as a ledge for more ice to accumulate. Other red flags include:
- Water stains on your interior ceilings or exterior soffits, suggesting moisture has already bypassed the shingles.
- Sagging gutters that appear to be pulling away from the fascia board due to the weight of solid ice.
- Inappropriate icicles that form behind the gutter or through the soffit vents rather than on the front edge of the gutter.
If you see these signs, your home is already under stress from ice weight and moisture penetration. Taking action before the next major storm hits is the best way to prevent long-term structural damage.
Self-Regulating vs. Constant Wattage: Choosing the Right Cable
Selecting the right material is the foundation of a successful gutter de-icing cable installation. While big-box stores often stock “heat tape,” professionals almost exclusively use self-regulating heat cable. This technology acts like a thermostat along the entire length of the wire. As the temperature drops, the conductive core contracts, allowing more electricity to flow and generating more heat. When the sun comes out and the air warms up, the core expands, reducing the power draw. It’s a responsive system that provides protection exactly where and when it’s needed.
Why Professionals Use Self-Regulating Cable
Safety is the primary driver for using this technology. In complex roof valleys or tight gutter corners, cables often need to cross over each other. If you cross constant wattage tape, it creates a hot spot that can melt the jacket or even start a fire. Self-regulating cable won’t overheat even if it’s doubled back on itself. It’s also significantly more efficient. With 2026 energy prices rising, using a system that scales its power consumption based on ambient conditions is a smart financial move. These professional-grade materials feature UV-stabilized jackets designed to withstand the intense high-altitude sun of Utah and Wyoming for 10 to 20 years. If you want a system that lasts, investing in high-quality Self Regulating Heat Cable is the only logical choice.
The Risks of Retail “Heat Tape”
Retail heat tape is a different animal entirely. It’s usually “constant wattage,” meaning it puts out the same amount of heat regardless of the outside temperature. This sounds effective, but it’s prone to burning out after just one harsh mountain winter. Many homeowners find themselves back on a ladder every October replacing failed tape because the internal heating elements have snapped or degraded. Beyond the inconvenience, these lower-grade products often lack the wattage needed to clear heavy snow loads in the Rockies. While you might see videos of using simple retail kits, those solutions rarely provide the long-term security a custom-designed system offers. They often fail when you need them most, leaving your gutters vulnerable to the very ice dams you tried to prevent.
Step-by-Step Gutter De-Icing Cable Installation
A successful gutter de-icing cable installation requires more than just draping wire over your shingles. It’s a precision task that starts with a perfectly clean drainage system. Any leftover leaves or pine needles can trap heat and create a safety risk, so your first step is a thorough gutter cleaning. Once the path is clear, you’ll need to secure the cable using specialized clips that grip the gutter lip or shingle edge. These clips are designed to hold the cable firmly in place without ever penetrating your roofing material, which preserves your roof’s warranty and prevents future leaks.
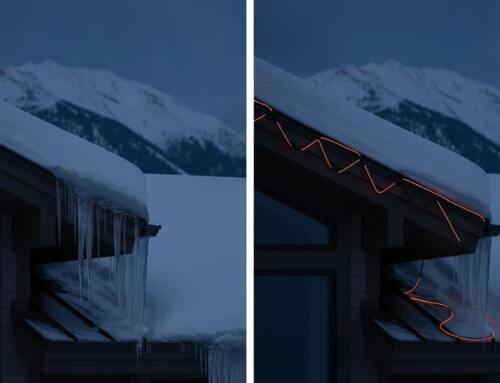
The layout should follow a logical path that mirrors the way water naturally flows off your roof. You’ll create a zig-zag pattern along the roof’s edge, ensuring the peaks extend at least 6 to 12 inches above the exterior wall line. This prevents ice from forming at the transition point where your warm attic meets the cold eaves. After the roof edge is secured, the cable drops into the gutter and runs straight toward the downspouts. This continuous loop ensures that once snow begins to melt, the water has a heated channel to follow until it’s safely away from your foundation.
Measuring and Design Layout
Precision measurement prevents the frustration of being several feet short at the end of a long run. To find your total cable length, add the total length of your gutters to the length of all downspouts, then calculate the roof edge requirement. For a standard 24-inch overhang, use a multiplier of 4.0 to calculate the necessary cable length for the roof edge zig-zag. Don’t forget to factor in “drip loops” at the transition points. These small loops of extra cable ensure that water drips off the wire and into the gutter rather than following the cable back toward your fascia or siding. Planning these details on the ground saves hours of adjustment once you’re on the roof.
Downspout Routing and Securement
The downspout is often where DIY installations fail. If you simply drop a cable down the hole, the weight of the ice and the cable itself will eventually cause the wire to stretch or snap. Professionals use dedicated downspout hangers at the top of every drop to support this weight and prevent mechanical strain. You must route the cable all the way through the elbow and out the discharge at the bottom. In the harsh climates of Utah and Wyoming, it’s vital to ensure the cable reaches the end of the discharge pipe. This prevents a “plug” of ice from forming at the exit, which would cause the entire system to back up and freeze solid. By maintaining this clear vertical path, you guarantee that meltwater actually leaves your property instead of refreezing in your gutters.
Electrical Requirements and Code Compliance
Safety starts at the breaker panel. A gutter de-icing cable installation is essentially a high-powered electrical appliance that lives in the harshest environment possible: submerged in slush and buried under snow. Because of this, you cannot simply plug a professional system into a standard outdoor outlet. Most residential systems require a dedicated circuit to handle the electrical load without tripping other breakers in your home. While 120V circuits are common for smaller homes, 240V systems are often preferred for larger properties or commercial buildings in Idaho and Wyoming because they allow for longer cable runs and greater energy efficiency.
The most critical safety component is the type of breaker used. Many homeowners are familiar with standard Ground Fault Circuit Interrupters (GFCI) found in bathrooms, which trip at 5mA to protect humans from shock. However, heat trace systems naturally “leak” a small amount of current when they are cold, which causes standard GFCIs to trip constantly. To avoid this, the National Electrical Code requires Ground Fault Equipment Protection (GFEP) breakers. These are designed to trip at 30mA; they provide the necessary protection for the equipment while preventing the nuisance tripping that leaves your roof unprotected in the middle of a storm.
NEC Code for Heat Trace Systems
Adhering to the 2026 National Electrical Code (NEC) is not optional. It’s a requirement for home insurance and local building safety. Article 426 specifically governs “Fixed Outdoor Electric De-Icing and Snow-Melting Equipment.” This code emphasizes the need for permanent wiring and proper grounding. Retail “plug-in” kits often fail to meet these standards because they rely on temporary extension cords or unrated outlets. For a system to be legal and safe in Utah, it must be hardwired into a weather-rated junction box by a professional who understands these specific regional requirements. Consult with a licensed electrical contractor to ensure your system meets every local safety standard before the snow flies.
Controllers and Automation
How you control your system determines both its effectiveness and your monthly power bill. A simple manual switch is the most basic option, but it relies on you remembering to turn it off when the sun comes out. In 2026, smart controllers have become the industry standard for efficiency. These systems use moisture and temperature sensors to activate the cables only when freezing conditions and precipitation are both present. This automation can reduce energy waste by as much as 80 percent compared to a manual system left running. Modern controllers also integrate with your home automation system, allowing you to monitor performance and receive alerts on your smartphone if a breaker trips.
Professional Maintenance and Long-Term System Care
A professional gutter de-icing cable installation is a long-term investment in your home’s safety, but even the best systems require a methodical approach to maintenance. You shouldn’t treat your heat trace as a “set it and forget it” solution. Instead, think of it as a seasonal shield that needs a quick check-up before the heavy snow arrives. Performing an annual fall inspection is the most effective way to ensure your property remains protected when the temperatures drop. If you wait until a blizzard hits to test your cables, you might find yourself dealing with frozen gutters when repairs are most difficult to perform.
Deciding whether to repair or replace an aging system depends on the age and type of materials used. While professional-grade self-regulating cables are designed for a 10 to 20 year lifespan, they eventually reach a point of diminished returns. If your system frequently trips breakers or shows visible signs of jacket degradation, it’s likely time for an upgrade. This is particularly important for complex rooflines or homes within HOAs, where a failing system can lead to ice dams that damage neighboring units or common areas. A professional design ensures that any replacement integrates seamlessly with your existing architecture while utilizing the most efficient 2026 technology.
Pre-Winter Checklist
Before the first Utah snowstorm hits, conduct a thorough visual inspection from the ground or a ladder. Look for any signs of UV damage or areas where local wildlife may have chewed on the cable jacket. It’s also vital to clear out all organic debris. Leaves and pine needles trapped in your gutters aren’t just a drainage problem; they can act as fuel if they’re packed tightly against a heating element. Once the gutters are clean, have a professional perform an amp-draw test. This technical check confirms the cable is drawing the correct amount of electricity and heating evenly along its entire length, ensuring there are no “cold spots” in your drainage path.
Why Choose Utah Heat Cable for Your Installation?
We provide custom heat-trace designs specifically tailored to the unique snow patterns of the Wasatch Front. Our team understands the underlying mechanics of ice dam formation, allowing us to build systems that offer elite-level protection with a down-to-earth, helpful attitude. As a licensed electrical contractor, we prioritize safety and code compliance, ensuring your gutter de-icing cable installation preserves your roof warranty and operates at peak efficiency. We take pride in delivering precision workmanship that gives you total peace of mind through the harshest mountain winters.
Schedule your professional heat cable consultation with David Tanner today to ensure your home is ready for whatever the coming winter brings.
Secure Your Home Before the First Snowfall
Protecting your property from the destructive weight of mountain ice requires more than a temporary fix; it’s a strategic investment in your home’s longevity. By choosing high-quality self-regulating technology over standard retail tape, you ensure your system remains efficient and safe for years to come. A successful gutter de-icing cable installation depends on precise engineering, from the zig-zag patterns on your roof edges to the critical vertical runs through your downspouts. Adhering to the latest 2026 electrical codes with GFEP protection isn’t just about compliance. It’s about the security that comes from a system that works when conditions are at their worst.
As a licensed electrical contractor, Utah Heat Cable specializes in custom self-regulating systems designed specifically for the extreme climates of Utah, Idaho, and Wyoming. We handle the dangerous high-ladder work and technical electrical design so you don’t have to. Our team ensures every component is installed to the highest standards of workmanship and safety.
Get a Professional Heat Cable Quote for Your Utah Home today and step into winter with total confidence. Your home deserves a defense as resilient as the mountains themselves.
Frequently Asked Questions
Can I install gutter de-icing cables myself?
You can attempt a DIY setup with retail kits, but professional gutter de-icing cable installation is highly recommended to ensure safety and long-term performance. Working on high ladders in freezing conditions presents significant physical risks. Additionally, a licensed electrical contractor understands the 2026 NEC requirements for permanent wiring and specialized breakers, which are essential for preventing house fires and ensuring the system functions when you need it most.
How much electricity does a gutter heat cable system use?
The power consumption of your system depends on the total linear footage and the type of cable used. Self-regulating cables are designed to be efficient; they automatically reduce their power draw as the ambient temperature rises. By using a smart controller with moisture and temperature sensors, you can reduce energy waste by up to 80 percent compared to a manual system that stays on all day.
Will heat cables damage my gutters or shingles?
When installed correctly, heat cables will not cause any damage to your roofing materials or drainage system. Professionals use specialized mounting clips that grip the gutter lip or shingle edge without the need for nails or screws that penetrate the roof. These systems actually protect your home by preventing the heavy ice accumulation that often causes gutters to sag or pull away from the fascia.
Do I need to leave the heat cable on all winter?
You don’t need to run your system continuously throughout the winter months. Running the cables on dry days or when temperatures are well above freezing is an unnecessary expense. Most professional installations include automatic sensors that only activate the system when moisture is present and the temperature drops below a specific threshold, ensuring the path stays clear without wasting electricity.
What is the difference between heat tape and heat cable?
The primary difference lies in the technology and durability of the materials. Retail heat tape is usually a constant wattage product that stays at one temperature, which makes it prone to burning out or causing hot spots. Professional heat cable is self-regulating, meaning it adjusts its heat output based on the surrounding air. This makes it significantly safer, more durable, and better suited for the heavy snow loads in Utah and Idaho.
How long do professional gutter de-icing systems last?
A professional-grade system is built to last between 10 and 20 years with minimal maintenance. These systems utilize UV-stabilized jackets that don’t crack under the intense high-altitude sun. In contrast, many homeowners find that cheaper retail products fail after just one or two seasons because they lack the industrial-grade components required to survive harsh mountain winters.
Can heat cables be used on metal roofs in Utah?
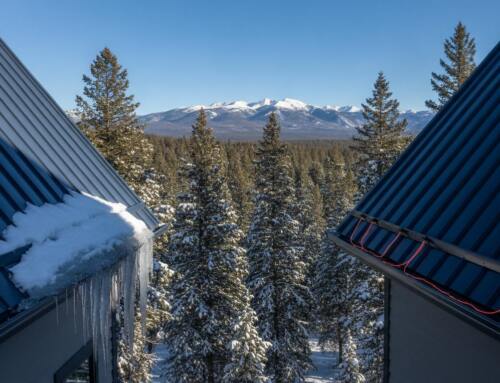
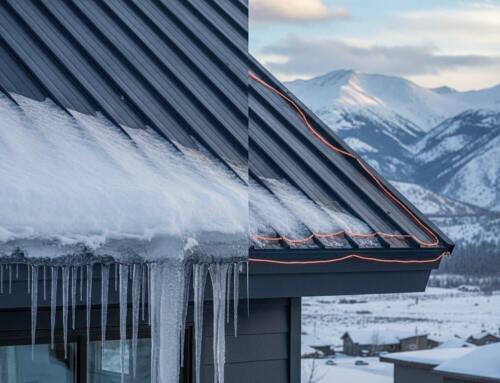
Heat cables are very effective on metal roofs, though they require a different mounting strategy than asphalt shingles. Since we can’t use standard shingle clips, we utilize specialized adhesive pads or standing seam clamps to secure the cable. This ensures the de-icing system stays in place even when large sheets of snow begin to slide off the slick metal surface during a mid-winter thaw.
What happens if my heat cable overlaps in the gutter?
If you’re using a professional self-regulating cable, overlapping is perfectly safe and won’t cause the system to fail. The cable’s internal core will simply sense the extra heat and reduce its output at that specific contact point. However, if you use constant wattage tape, overlapping creates a dangerous hot spot that can melt the protective jacket and lead to an electrical short or a fire.